There’s plenty of guides out there on how to build a PC. Putting together a new computer is a complex task, and it’s great there are so many resources out there for the aspiring PC builder. However, there’s not a lot of info on how to upgrade an existing PC. I realized this when NZXT sent us a Kraken X72 AIO CPU cooler and an E850 modular power supply.
It’s intimidating when you look at your beautiful, fully-functional PC that you spent hours building and getting just right and think about replacing parts. No one wants to strip their PC down to the case to add a few things, so how do you figure out how to get the old parts out, and get the new ones in? Switching a power supply and CPU cooler are two of the more invasive upgrades you can undertake, and I’ve put together my process below for anyone who wants to add some new parts into their PC the right way without rebuilding the whole thing.
Preparing to Upgrade Your PC
One of the biggest mistakes you can make during the process of building or upgrading a PC is to just wing it. You need to make a plan of attack that takes into consideration the design of your case, how the components you want to remove fit into the case, and what you need to do to get the new parts in.
The case I use for my primary PC is a Corsair Carbide Series Air 540 ATX Cube Case. Fortunately, this beast of an enclosure gives you a lot of room to move and lets you cheat a bit at cable management due to its dual chamber design. One chamber holds the motherboard, CPU, and GPU, basically all the stuff that needs good airflow. The second contains the power supply, hard drive cage, and 5.25″ modules. This makes it much easier to install components in a way that promotes good cooling without having to struggle with cable placement.
Given the set up of my case my gameplan was:
- Remove the existing CPU cooler and radiator.
- Remove the installed power supply.
- Install the new E850 PSU.
- Install the Kraken X72.
Tools You’ll Need
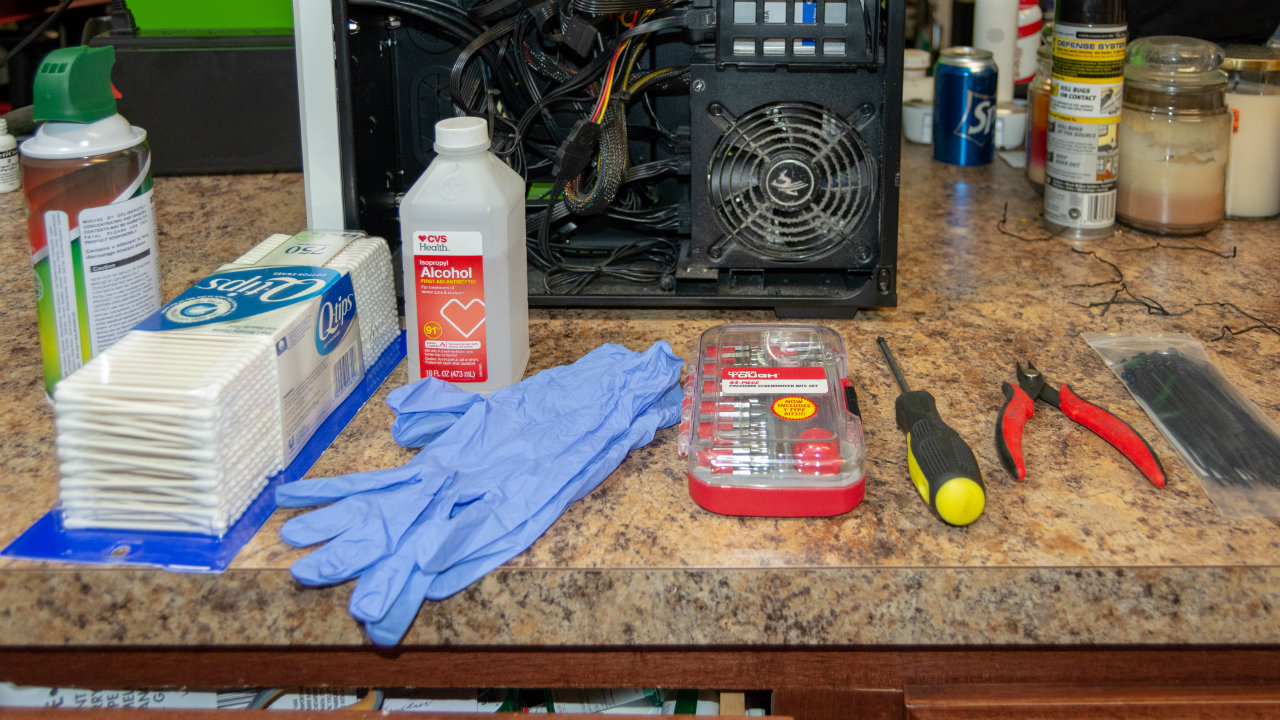
Before I started disassembly, I also got together the tools I would need.
- Phillips Screwdriver with Magnetic Head: This is going to be your most-used tool. Electronics and magnets don’t usually mix, but the magnetized head of the screwdriver doesn’t have a strong enough field to interfere with any PC components.
- Small Set of Snips: These are useful for cutting existing cable ties.
- Precision Screwdriver Set: For any screws that are too small for your primary Phillips head screwdriver or any non-Phillips bolts or screws.
- Can of Air: For cleaning out dust build-up.
- Q-Tips: For cleaning thermal paste off your CPU.
- 91% Isopropyl Alcohol: Solvent for cleaning off the thermal paste. Note that the higher the alcohol content, the better as you want this to dry quickly.
- Nitrile Gloves: For preventing the transfer of skin oil to the surface of the clean CPU.
- Zip Ties: For tying down cables.
These don’t have to be the most-expensive variants of these items, and many of them can be used over several builds. It’s likely you already have most, if not all, of these in your house, so just use whatever you’ve got.
Further Preparation
There are a few other things you can do to make your life easier when removing the old parts and swapping the new ones in. I took out my Elgato HD60 Pro and GPU to give me more room to move around. I also used the can of air to thoroughly clean the case and filters out. Depending on how much of a neat freak you are and how long its been since you cleaned your PC out, this could be an endeavor in and of itself.
My case was a bit dusty, but not too bad, and didn’t take too long to spray out. Some cases get dirtier than others so your mileage here may vary. However, there’s no sense in putting new parts in a dirty computer, so it’s best to bite the bullet and do this step right.


