Knowing how to change the username on Oculus Quest 2 will allow give players more freedom in who they can be online as well as save them from potential embarrassment at an outdated ID. But the process might not be clear for some people. Here’s how to change username on Oculus.
How to change Oculus username

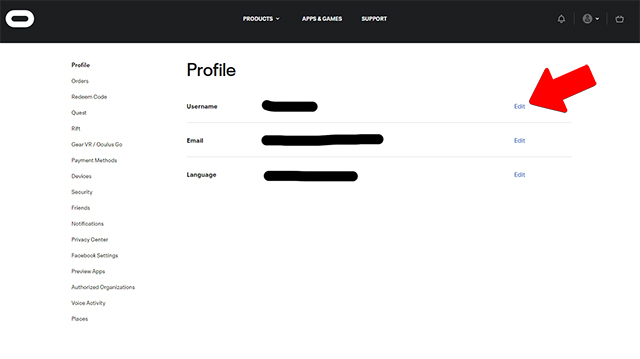
To change the Oculus Quest 2 username or the username on for any Oculus headset, users must first log in to the Oculus website. Once logged in, it will bring users to the above page. Click on the “Edit” button (where the red arrow is pointing) on the right side of the screen near the current username.

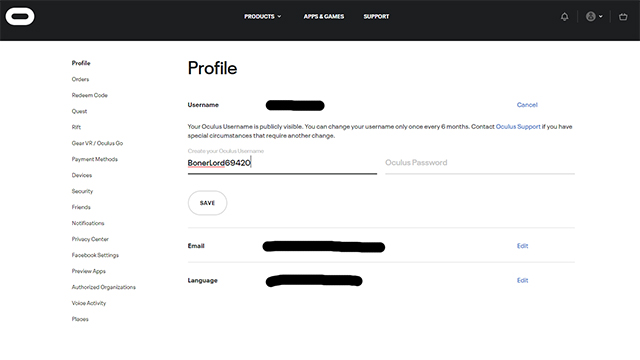
Once that is done, the page will drop down a couple of new dialogue boxes. The one on the left will be the one the new username goes in. The one on the right is for the account password. Just fill those two boxes in and hit “Save” to save the changes.
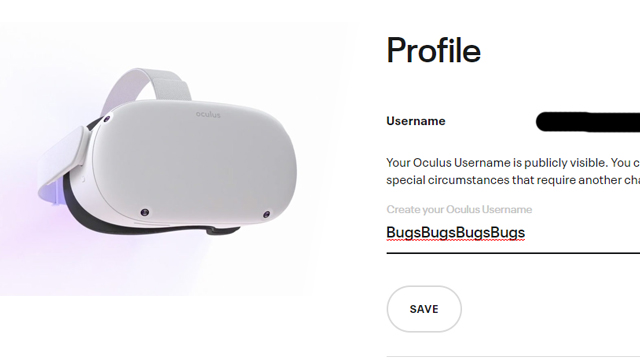
There are a few rules though. As the above picture says, users can only change their account username every six months. Be sure to choose it somewhat carefully. Secondly, usernames have to be from two to 20 characters and “may include letters, number, dashes, underscores, and periods, but may not include dashes, underscores, or periods consecutively.” This means users can use these symbols but not in a row. They are fairly simple rules but rules nonetheless.
This will help players be more comfortable online, but there are also ways to step up comfort while playing the Oculus Quest 2. There are multiple face cushions and braces players can buy to more evenly distribute the weight of the headset, which helps as VR can be fatiguing after long sessions. Changing usernames might also be a good way to bring in a new headset, which is sadly one of the only roundabout ways to “upgrade” the internal memory of the system.


