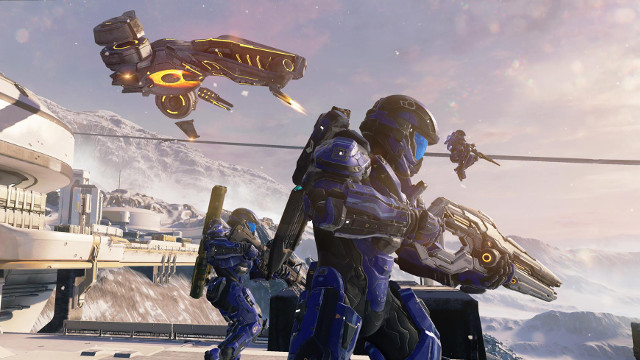
Just a week ago I stepped into Halo 5: Guardians' Warzone mode for my first time. Although the game gave a brief audio overview before the match, I found myself confused after being unleashed upon the open environment. It wasn't until I spent a couple hours competing in the mode that I felt comfortable with it.
Today, Halo 5: Guardians landed on store shelves, and there are thousands of players who are experiencing Warzone for their first time just as I did last week. As a matter of fact, I found myself explaining how the mode works in nearly every match I played last night. So, I decided that I should use my knowledge to help others. Below you will find a complete guide to Warzone, the Requisition System, and even a few tips.
Objectives
Warzone battles are waged on one of several large maps with two teams comprised of 12 players. Each of the two teams has a main base, and there are three Capture Points that must be fought over. Unlike traditional Halo multiplayer, these objectives are large in scale, and require teamwork and communication to conquer. You can expect the average match to last around 25 to 30 minutes.
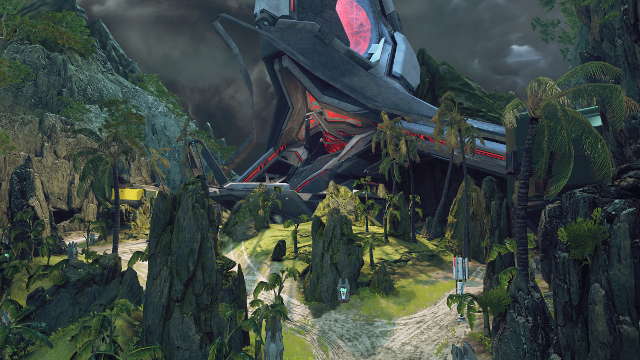 This is the middle Capture Point of 'Raid on Apex 7'. It's called Spire, and it's a major point of conflict in Warzone matches.
The objective elements are as follows:
Capture Point: There are three of these on each map. They can be captured by standing within their area of effect. If more team members are present, it will be captured more quickly. Having a Capture Point in your team's possession allows you to spawn in its vicinity providing a team with a map presence advantage.
Core: Each team has a core, which is essentially their home base. This can only be entered by an enemy team once they have captured all three of the Capture Points. Destroying the Core results in an instant win no matter how many points each team has.
Friendly A.I.: When you obtain a Capture Point, your team earns non-player character NPCs that help to guard the point. They aren't very powerful, but they are annoying for the enemy team to deal with when trying to take the point from your team.
Enemy A.I.: There are several A.I. enemies as well as Legendary Bosses that can spawn around the map. The more difficult, high reward A.I. will spawn in vehicles that pose a serious threat to players. Names include Soldier Captain, Knight Champion, and Baron 'Sraom. Killing these grants your team a sum of Victory Points. The tougher the enemy, the more points your team will be rewarded. Note that the team that lands the last shot on the enemy is which receives the Victory Point bonus. Be sure to keep enemies away once an A.I.'s health gets low.
The Goal
There are two victory conditions. In most circumstances earning 1,000 Victory Points is what will trigger the end of a match. However, in the event that one team is overwhelming the other, they can choose to storm the opponent's Core and lay waste to it for an early victory.
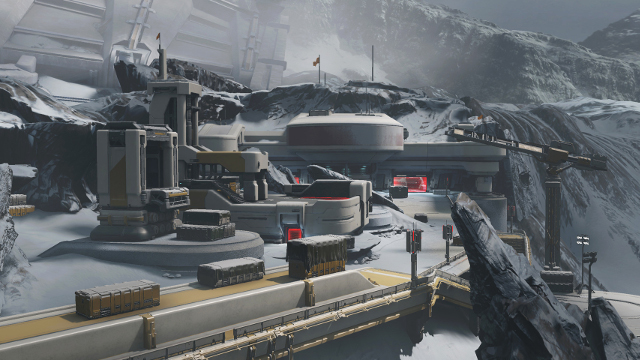 In the middle right of the above image you can see a red gate. The enemy team can only enter this base where the Core is located once they have acquired all three Capture Points, which is an uncommon occurrence.
The two victory conditions are as follows:
Earn 1,000 Victory Points. When a team reaches 1,000 Victory Points, the game is over. Each team starts at 0 and the totals can be seen on the bottom right of the screen. Your team earns Victory Points every few seconds based upon how many Capture Points they have. Owning two of the three Capture Points, or all of them, is preferable. Although, owning one can be made up for by successfully clearing enemy A.I. Your team will need to balance offense, defense, and taking down enemy A.I. to be victorious. Being good at just one of these things isn't enough.
Destroy the enemy Core. The Core is only available once a team has captured all three Capture Points. It is a pillar-shaped structure in the middle of a difficult-to-enter facility. It requires a lot of firepower to take down, but a barrage of explosives will do the trick. Just be sure not to lose a Capture Point while you have the enemy team pushed back into their base.
Requisition System
As you compete in multiplayer you will earn Requisition. There are many types of Requisition rewards, some of which simply change how you look, while others offer gameplay options that are advantageous in Warzone.
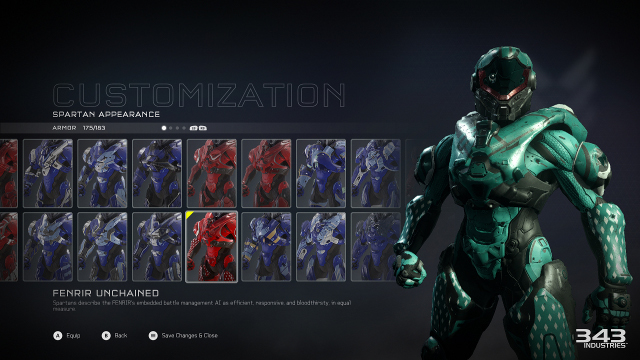 There are hundreds of items to unlock that allow you to personalize your appearance. Above is the Fenrir Unchained armor, which like others can have its color scheme and helmet customized.
Many of the items you will earn are called Unlimited-Use Requisition. These are items that you can use freely without ever expiring. The types are as follows:
- Armors, Helmets, and Visors: Alter how you look to other players.
- Stances: Change how you look on the main menu and during the intro of Arena matches.
- Weapons: There are a limited number of weapons that can be unlocked. These can be swapped out in either your default Assault Rifle or Magnum slot. The change only applies to Warzone.
- Weapon Skins: Alter how your weapon appears without affecting functionality.
- Assassination Animation: Change the animation that occurs when you sneak up behind an enemy and press RB.
There are also Single-use Requisitions. These are exclusive to the Warzone game mode, and an extremely important element of victory.
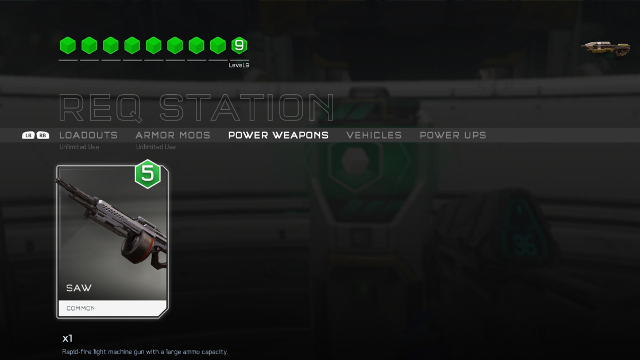
Above is the Req Station menu. On the top left you can see your Req Level. On the left side you can see that the SAW weapon is selected, which is a Common item. It requires 5 Req Level to use, as denoted by the green hexagon. Below that you can see that the player only has one of these cards, so after its use the player will need to acquire another one.
How they work is each Single-use Requisition has a Req Level attached to it. When playing in Warzone, your Req Level will go up as you and your team kill players and conquer objectives. Once your Req Level is high enough, you can deploy the Single-use Requisition.
There are many types of Single-use Requisitions. There are dozens of "Power Weapons", ranging from the Carbine to the Rocket Launcher. There are vehicles that can have a huge impact on games if used well including the Ghost and Scorpion. There are even Power-Ups such as Overshield and Active Camo which offer you an advantage until you die.
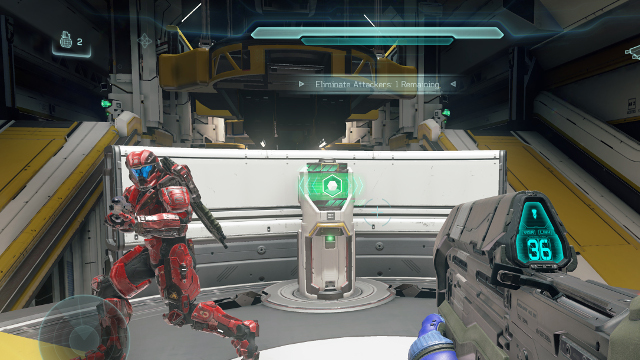
The console with a green screen is a Req Station.
In order to use Requisition items you will need to visit a Req Station. These can be used by either dying and entering the menu by pressing Y, or by finding one on the map and walking up to it.
It's important to note that single-use Requisitions are, as indicated by their name, only able to be used once. How you use them is up to you, but it's a good idea to deploy your rare Single-use Requisitions carefully. Nothing is worse than having your vehicle blown up shortly after spawning and having no impact on the match.
Requisition Packs
You will earn Requisition Points based on your performance in Arena and Warzone matches. You can choose to spend these on one of three levels of Requisition Pack. It is recommended to spend these on the 10,000 point Gold Requisition Pack since only this type of pack includes the extremely rare items.
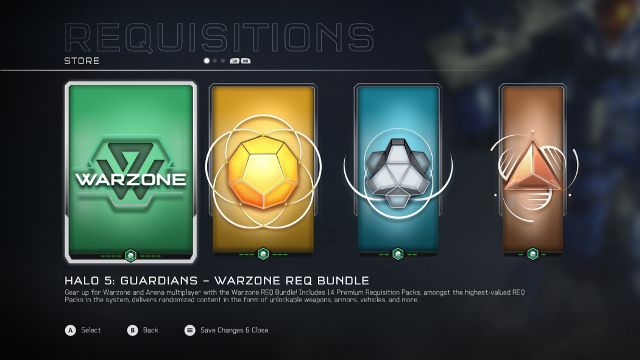 Opening Req packs is one of the most enjoyable things about Halo 5 multiplayer. As Forrest Gump would say, "You never know what you're gonna get".
Requisition Packs are also a microtransaction item. For $2.99, you can buy one Gold Pack at any time. There is also a Warzone Req Bundle available for $24.99. While it's expensive, it will provide a whopping 14 Premium Requisition Packs ($42+ value) over a seven week period. It's the best bang for your buck if you plan to play Warzone for the months to come.
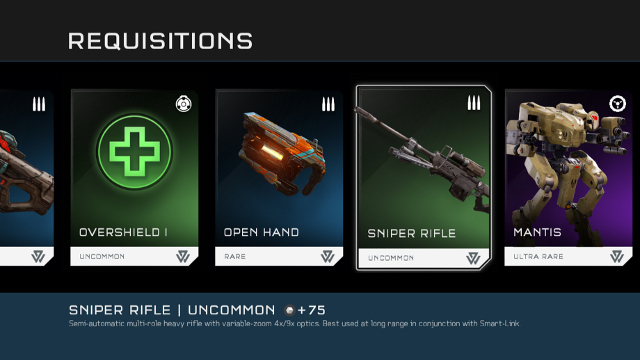 Once you open a Req Pack you'll find yourself staring at a bunch of new Requisition items that are now yours. These items can be either Unlimited-use or Single-use Requisition. Hopefully, you'll find Rare or even Ultra Rare items.
But you don't have to spend real-life money on these. You'll earn a Gold Pack every three or so Warzone matches. In addition, you'll be rewarded plenty of them simply for leveling up. Just be sure to perform to your best by focusing on objectives and teamwork so you get as many points as possible for each match.
General Tips
Now that you know how Warzone works, let's go over a few tips for improving your skill in Halo 5.
Use your Thrusters often. These are only on a five second cooldown, and serve a ton of purposes. When engaged with another enemy, or if someone gets the drop on you, quickly boost toward cover for a chance to survive. Or, use it to charge toward an enemy who is getting away from you.
Keep your crosshair at chest height. A lot of players tend to aim toward the ground when moving around. Once they engage another player, they have to move the crosshair farther. You should always try to make it so that your crosshair has to move as little as possible to shoot at enemies. This is a game of milliseconds, after all.
Always have an escape route. When moving around try to position yourself to not be out in the open. Your goal should be to make yourself harder to hit.
Don't bother with Ground Pound unless you're just having fun. Landing this skill on someone takes a very high level of timing and precision. You're better off trying to rush them and using Spartan Charge, or just shooting them in the face.
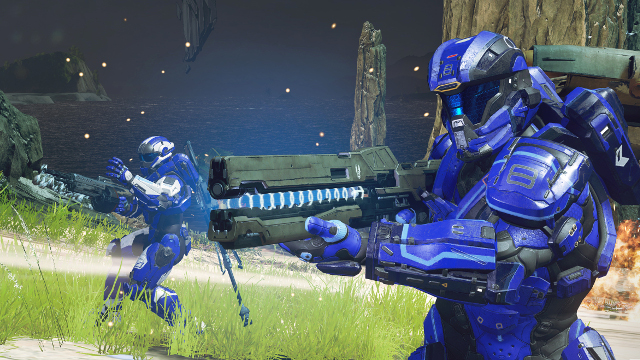
Aim for headshots. While difficult at first, headshots are what separate the average player from a pro. With a weapon like the Magnum having a high headshot ratio can result in high KDR.
Use the Magnum for long-range. The default sidearm in Halo 5 multiplayer is way more effective than you may think. It's a headshot oriented, precise weapon. You'll want to use it over close-range weapons like the Assault Rifle when in distant combat scenarios.
Try this. Run forward, press R3 to slide, press A to jump, and then press B to boost. This slide, jump, Thruster combo is extremely good for covering ground quickly and getting out of harm's way.
Sell the Requisition items you don't like. When you visit your Collection menu you can go to any of your One-time Requisition and sell them by pressing X. You may want to sell Mongoose vehicles and any weapons that you don't enjoy using.
You can hover in the air for a custom vantage point. If you're jumping around and you spot an enemy, hold LT to begin hovering in the air. You can then fire on them from your unique position. From there you can let go of LT to let gravity bring you to the floor.
Thank you for reading this guide. If you have any questions, feel free to leave a comment below.
