XCOM 2 has a total of five classes, each with their own skill trees. As a squad member ranks up, he or she will be provided with up to six opportunities to make a choice between two different skills. These skills are powerful and completely alter the way a squad member performs on the battlefield. Furthermore, the skill tree choices you make will greatly impact your experience.
We have used each of the skills in XCOM 2 and are here to lend a hand during your decision-making process. Below you can read about every skill in the game along with a general rating on their effectiveness.
Grenadier

Corporal
Blast Padding
Description: Your gear includes layers of extra padding and blast plates, granting a bonus point of armor and 66% less damage from explosive attacks.
Rating: 3/5
Explanation: The armor provided makes a Grenadier capable of sustaining major damage, allowing you to position the unit closer to the enemy's front line. This closer positioning makes the Cannon and other close-ranged Grenadier weapons much more effective. It is reliable due to its passive nature and will likely come into use in most missions you take on.
Shredder
Description: Your cannon attacks shred armor.
Rating: 3/5
Explanation: Shredding armor is a vital strategical component of the game. The problem with Shredder is that, for one, the Cannon's short range and low Aim makes it a poor choice for entry, which is when armor shredding is most important. Secondly, grenades shred armor and are more reliable. However, Shredder pairs well with several other skills in the Grenadier tree, increasing its effectiveness as the Grenadier increases in rank.
Sergeant
Demolition
Description: Unleash a volley of bullets at your target's cover, significantly damaging or destroying it. Deals no damage to your target.
Rating: 2/5
Explanation: While situational, high cover is a common issue that gives the enemy team an advantage in firefights. Although the Grenadier will use a turn to break the cover and reveal the opponent, it can be a good investment if followed up with a clean kill by teammates. That said, in most situations it's better to use a grenade to not only break cover but deal AoE damage at the same time.
Suppression
Description: Fire a barrage that pins down a target, granting reaction fire against it if it moves, and imposing a -50 penalty to the target's aim. Uses 2 ammo.
Rating: 2/5
Explanation: This is very good for locking down dangerous opponents who are in high cover. If they choose to fire from said cover, they will have an imposed aim reduction. If they leave the cover, they will be fired upon. The only shortcoming is that the Cannon is short-ranged in nature, and thus this ability is only at its best effectiveness in short-ranged scenarios. The two ammo requirement is also a shortcoming.
Lieutenant
Heavy Ordnance
Description: The grenade in your grenade-only slot gains a bonus use.
Rating: 4/5
Explanation: This is a must-have for most Grenadier units. Grenades are extremely potent, and being able to carry one more into a mission allows the Grenadier to provide more utility, and rely less on the Cannon. This skill becomes increasingly effective over the course of the game when AoE becomes more of a necessity and new grenade types are unlocked that can be placed in the grenade-only slot, such as the Incendiary Grenade.
Hold Targeting
Description: Any directed cannon shot, hit or miss, will mark the target, increasing your squad's aim by +15 against this target.
Rating: 2/5
Explanation: This is great for improving your squad's effectiveness against the more dangerous enemy types. The only problem is that typically these enemies have armor that should be shredded with grenades. Therefore, this is best used in Grenadier openers who have the Shredder skill equipped.
Captain
Volatile Mix
Description: Your grenades have an increased radius of 1 tile, and deal +2 damage.
Rating: 5/5
Explanation: The AoE component of grenades is important in being able to set up strong entries, and this skill will allow you to affect more enemies or teammates with each grenade launch. The increase in effective damage for the grenades is vital for keeping offensive grenades relevant toward the latter half of the game when enemies have larger health pools.
Chain Shot
Description: Take a shot with an aim penalty of -15. If you hit the target, you take another shot on the target automatically.
Rating: 3/5
Explanation: This skill is highly RNG oriented. While you take a significant risk, the reward is a potential one-hit kill. The problem lies in the fact that situations where the skill is used, missing can be potentially devastating to your squad. You'll want to weigh the risk/reward in each circumstance that you think about utilizing the skill. In the long run, the 100% increase in damage on proc significantly increases the potential damage output of the Grenadier, making the unit less reliant on grenades.
Major
Salvo
Description: Launching or throwing grenades, or using heavy weapons with your first action, will not end your turn.
Rating: 3/5
Explanation: The best use of Salvo is placing the Grenadier in an offensive position, and then pulling him or her out after an attack. In many situations the Grenadier will be one of your most resilient squad members, and in a mid-range position where relocation isn't a necessity. This makes Salvo very situational and reliant on strong tactical play.
Hail of Bullets
Description: Unleash a hail of bullets that is guaranteed to hit your target, but uses a lot of ammunition.
Rating: 4/5
Explanation: Although all your ammo is expended in order to use this skill, the ability to guarantee a hit on a target, especially on a Grenadier, makes it one of the most reliable skills in the game. This effectively makes the Grenadier an executioner who is proficient at removing targets from the battlefield who are at half health or lower.
Colonel
Saturation Fire
Description: Fire a cone shaped barrage of bullets at every enemy in an area. In addition, the cover of those enemies can be damaged or destroyed. Uses 3 ammo.
Rating: 3/5
Explanation: This is capable of punishing several enemies who line up too close to your Grenadier, in addition to destroying cover. The problem is it requires 3 ammo, meaning you'll need to ensure you have the necessary ammo before taking a strong position to use the skill. It is recommended that you modify your cannon to have a larger ammo capacity, so that you don't have to plan ahead as heavily when using the skill.
Rupture
Description: A Rupture shot deals critical damage and ensures that the target takes an additional +3 damage from all attacks in the future. Uses 3 ammo.
Rating: 5/5
Explanation: This skill makes dealing with high defense, high health enemies much more manageable. Enemies that may typically require two to three turns to remove from the battlefield can be taken out within just a couple shots. Although the 3 ammo cost will require some tactical preparation, the payoff is significant. This pairs well with Shredder, allowing you to remove armor, critically wound, and mark a target with a single unit's turn.
Psi Operative

Corporal
Insanity
Description: Debilitating telepathic attack that can inflict different negative conditions, including mental control of the target.
Rating: 3/5
Explanation: Capable of disorienting, stunning, or even mind controlling a target, Insanity reduces the threat level of a foe. Its only weakness is in that it's heavily RNG oriented, resulting in it being a fun but often times unreliable skill. It's also unusable on mechanical enemies. This skill is made much more potent by skills found later in the tree, meaning that it can scale with the level of your Psi Operative.
Inspire
Description: Grant a bonus action immediately to a nearby squadmate.
Rating: 2/5
Explanation: This skill is best used for correcting position, such as a Ranger who has been put in a position of high threat. It's reliable and has a short cooldown making it useful on just about any mission.
Sergeant
Soul Steal
Description: Using Soulfire now heals you for half of the damage dealt
Rating: 2/5
Explanation: Soulfire is a great skill for hitting enemies behind cover, and this this skill will augment the ability to heal you after dealing damage. This is great for making the Psi Operative less dependent on heals from Specialists, and increasing the unit's sustain.
Stasis Shield
Description: Stasis can be used on friendly units.
Rating: 3/5
Explanation: With this you can force enemies to shift their attention away from their current focus target, allowing the Stasis'd teammate to recover after the turn and potentially hit enemies from their flank. As with most Psi Operative skills, it requires careful and deliberate tactical execution, though.
Lieutenant
Solace
Description: The Psi Operative is surrounded by an aura that immediately extinguishes or blocks any mental impairments for themselves and any nearby allies. Passive.
Rating: 3/5
Explanation: This skill is a hard counter to impairment from enemies such as the Sectoid, which are a common nuisance to deal with on the battlefield. Given that it's passive, it's dependable and only requires careful positioning of the Psi Operative due to its maximum range.
Sustain
Description: Once per mission, when the psionic soldier is reduced to 0 hit points, he is instead reduced to 1 hit point and put into stasis for 1 turn.
Rating: 1/5
Explanation: Although this can come in handy, especially at higher ranks, you are investing in a skill that is only useful when the Psi Operative "dies". Death of a Psi Operative should be a rare occurrence. If you do decide to take up this skill, you'll want to make sure that your Psi Operative plays aggressively and confronts enemies in high risk situations to take advantage of the skill.
Captain
Schism
Description: Insanity now does a small amount of guaranteed damage, and applies Rupture to the target.
Rating: 4/5
Explanation: This skill makes Insanity a very strong skill for opening fights. It'll not only result in it inflicting impairment, but dealing damage and making the affected opponent much easier to take down.
Fortress
Description: The Psi Operative is immune to fire, poison, acid, and explosive damage.
Rating: 1/5
Explanation: This is a highly situational skill. There are circumstances where being able to push through environmental damage can be of great benefit, but that isn't common. This skill does make your Psi Operative more resilient in situations where these factors are present, but it's not a dependable choice.
Major
Fuse
Description: If an enemy is carrying explosives, they can be remotely detonated by the Psi Operative.
Rating: 4/5 (5/5 in terms of fun)
Explanation: This skill hard counters grenade inventory on enemies. Although enemies with grenades aren't frequently encountered, you'll be glad you have this skill when you do encounter one. This causes pure mayhem on the enemy's front line by causing unexpected explosions resulting in reduction of health and destruction of cover. It's worth noting that this skill can be used even on perished enemies who have grenades on their body.
Domination
Description: Permanently mind controls an enemy. Only one successful Domination can be performed per mission.
Rating: 5/5
Explanation: Dependent on the Psi stat of the Psi Operative in relation to the opponent, this skill serves as the best kind of crowd control. Not only is the opponent rendered docile, but it allows you to use that enemy to deliver attacks. A successsful mind control will lead to not only the Dominated enemy dying, but other enemies taking damage from their teammate.
Colonel
Null Lance
Description: Project a beam of psionic energy that damages every target it passes through.
Rating: 3/5
Explanation: Requiring perfect positioning from both yourself and enemies due to its one-width radius, this skill is capable of dealing serious damage. It's extremely situational, though.
Void Rift
Description: A large AoE ability dealing moderate damage and a chance to inflict insanity on all targets in the storm.
Rating: 5/5
Explanation: AoE is extremely effective, and Void Rift is one of the best AoE skills in the game. It deals immediate damage and can inflict Insanity to organic enemies. It punishes grouped up enemies in a major way, and can turn the tide of battle.
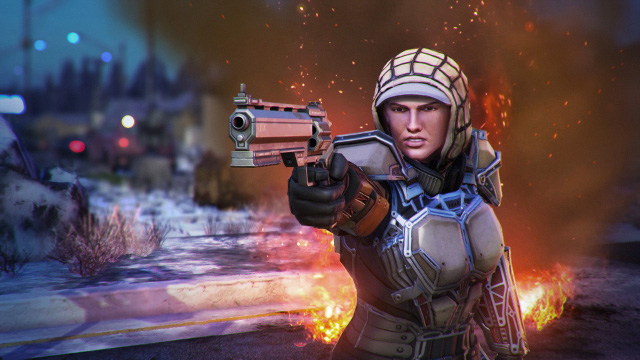
Ranger

Corporal
Phantom
Description: When the squad is revealed, this soldier remains concealed.
Rating: 3/5
Explanation: Concealment is very powerful. With Phantom the Ranger can be a reliable scout, in addition to being able to find perfect positioning before ambushing opponents even in missions where the squad doesn't start in concealment. This skill pairs well with Shadowstrike in the next tier.
Blademaster
Description: Deal +2 extra damage on all sword attacks
Rating: 2/5
Explanation: The sword is very useful early on, but becomes increasingly less viable as you get further in the campaign and more dangerous foes are present. Moving in to meleee range is simply too dangerous in most situations unless only one enemy is left standing.
Sergeant
Shadowstrike
Description: While concealed, gain +25 bonus aim and +25 bonus critical hit chance when attacking enemies.
Rating: 3/5
Explanation: This allows the Ranger to deal extremely high damage in openers reliably using the shotgun. It is likely to come into use in every battle you engage in, although it's worth noting that your first shot is usually the easiest one to set up, so Shadowstrike won't help you when you need it most. You'll likely want Conceal in the next tier to ensure you get the most out of this skill.
Shadowstep
Description: This soldier does not trigger overwatch or reaction fire.
Rating: 2/5
Explanation: In situations where enemies have setup an ambush, being able to move your Ranger around near them without worrying about overwatch is a nice perk. These situations aren't common, though.
Lieutenant
Conceal
Description: Immediately enter concealment once per mission.
Rating: 3/5
Explanation: This skill makes your Ranger a force to be reckoned with. Ambushes can be performed more regularly, and even after your initial engage. This pairs extremelyw ell with Shadowstrike from the previous tier, allowing you to get well-timed openers on dangerous targets that appear after your initial engagement.
Run and Gun
Description: Take an action after dashing.
Rating: 4/5
Explanation: This skill makes a Ranger far more mobile, allowing him or her to move great distances without sacrificing offensive capability.
Captain
Implacable
Description: If you score one or more kills on your turn, you are granted a single bonus move.
Rating: 4/5
Explanation: Mobility is very important, and this allows a Ranger to get in and out of battle quickly assuming he or she is able to finish enemies off. It's particularly effective for taking out stray or low health targets in spots that don't have high cover for your Ranger nearby.
Bladestorm
Description: Free sword atacks on any enemies that enter or attack from melee range.
Rating: 1/5
Explanation: This skill serves as a counter-attack for melee enemies like the Stun Lancer. There are circumstances where it'll trigger and save your life, but these situations shouldn't be common provided you're positioning your units carefully. Given the only low to moderate damage throughput of the sword, it isn't goiing to make a profound impact that substantiates its existence this far down the skill tree.
Major
Deep Cover
Description: If you did not attack this turn, hunker down automatically.
Rating: 4/5
Explanation: This skill makes the Ranger a much safer scout, allowing you to double move without worrying too much about being exposed. The Ranger tends to be a highly active unit that fires early and often which may make this skill appear less favorable, but it pairs with Overwatch. So, with this skill you can make your Ranger a highly resilient ambusher.
Untouchable
Description: If you score a kill during your turn, the next attack against you during the enemy turn will miss.
Rating: 4/5
Explanation: The Ranger needs to be aggressive, and sometimes that means putting him or her in harm's way. Untouchable will allow you to pick off enemies without fear of being destroyed by a nearby foe. That said, it only allows for one full dodge, so you'll want to ensure that you aren't exposed to multiple enemies on the subsequent enemy turn.
Colonel
Rapid Fire
Description: Fire twice in a row at an enemy. Each shot suffers an Aim penalty of -15. There is no cooldown on this ability. Uses two ammo.
Rating: 5/5
Explanation: Although the Aim penalty can result in some unlucky encounters, a 15% chance to hit reduction is more than made up for by a second hit. This effectively increases the potential damage throughput of your Ranger by around 80%, provided he or she as the ammo available. It is advised that you modify your shotgun with increased ammo capacity to ensure you can utilize the skill more often without running out of ammo.
Reaper
Description: A devastating chain melee attack where the first melee attack cannot miss. Each mielee kill in Reaper mode grants an extra action.
Rating: 4/5
Explanation: This skill is mandatory for sword-oriented Rangers as it allows them to deal far more damage and move out of harm's way afterward. Once this skill is unlocked, sword-focused play becomes viable in late game. It is prone to punishment, to it's advised that you equip your Ranger with good armor and Untouchable from the previous tier.
Sharpshooter
Corporal
Long Watch
Description: Allows Overwatch to trigger with Squadsight.
Rating: 2/5
Explanation: Squadsight significantly reduces the chance to hit with a weapon, making this a highly RNG oriented skill. You'll want to equip your Sharpshooter's sniper rifle with as much Aim as possible to improve the effectiveness of the skill.
Return Fire
Description: When targeted by enemy fire, automatically fire back with your pistol once per turn.
Rating: 2/5
Explanation: Traditionally, a Sharpshooter is the unit you will want to protect most, and therefore will stray from confrontation. But sometimes enemies will find their way toward a Sharpshooter, and in these circumstances the counter-attack can be a nice way to remind them who they are messing with.
Sergeant
Deadeye
Description: Take a shot with a small aim penalty for a significant damage boost.
Rating: 2/5
Explanation: In some situations it'll be imperative that you finish off a foe with your sniper rifle shot, and in these cases Deadeye might be required to deal enough damage for the job. In these circumstnaces, the reduced chance to hit can be a serious concern, lowering the effectiveness of the skill.
Lightning Hands
Description: Fire your pistol at target. This attack does not cost an action.
Rating: 4/5
Explanation: You will want this skill whether you're going for a sniper or a gunslinger build as it allows you to prelude any attack or movement with a free pistol shot. It's a great way to rack up damage reliably.
Lieutenant
Death From Above
Description: Killing an enemy at a lower elevation with your sniper rifle costs only a single action, and does not end your turn.
Rating: 3/5
Explanation: This skill is essentially required for mobility with the Sharpshooter. Without it, a Ranger become highly immobile when using the sniper rifle. It can be used to move after a shot in addition to reloading.
Quickdraw
Description: Firing your pistol with your first action no longer ends your turn.
Rating: 2/5
Explanation: Essential for gunslinger builds, this skill veers the Sharpshooter more toward playing similar to a Ranger, foregoing stationary support attacks for front-line aggression. In many circumstances this mobility isn't all that useful, although in a time-crunch with limited turns or pressure from enemies it's a nice perk.
Captain
Kill Zone
Description: Take a reaction shot against any enemy that moves or attacks within cone of fire.
Rating: 3/5
Explanation: This skill locks down an area and provides an effect similar to Overwatch, but in a specified area. It's great for punishing enemies who move out of position within the desired area. It works more reliably than Long Watch, and can be used after movement, making it a strong choice.
Faceoff
Description: Fire once at every visible enemy with your pistol.
Rating: 4/5
Explanation: This serves as an unorthodox means of AoE damage. A well positioned sniper can spin around shooting several enemies instead of focusing fire on a single target. Since the pistol doesn't have an ammo capacity, this can result in damage dealt to upward of a dozen enemies, which is simply incredible. The only problem is that the Sharpshooter tends to be less than favorable as a front-line combatant, and therefore may not find him or herself in a position to fully take advantage of the skill unless fully equipped for such a situation.
Major
Steady Hands
Description: If you did not move your last turn, gain +10 Aim and +10 Critical chance.
Rating: 3/5
Explanation: The Aim and Critical chance bonus are marginal improvements. Where they are best served is in potentially augmenting some of the chance to hit lost from Deadeye shots. Even outside of Deadeye, the increased stats will help make the Sharpshooter function more reliably as a damage dealer.
Aim
Description: Hunker Down now confers +20 Aim to the first shot on the following turn.
Rating: 3/5
Explanation: This skill is best used for setting up strong ambushes on enemies. It is also good for when the Sharpshooter is getting set up, and has moved on a turn and thus is unable to fire the sniper rifle anyway. It doesn't provide a huge impact on the battlefield like other skills this far down the skill tree, but will make the Sharpshooter more reliable at dealing out damage.
Colonel
Serial
Description: A powerful chained shot ability. For every kill made with your sniper rifle, your actions will be refunded.
Rating: 4/5
Explanation: With this skill the Sharpshooter can lay waste to several enemies who are low on health, or reposition following a kill. It's a very powerful ability that makes the Sharpshooter a nightmare to deal with for the opposition.
Fan Fire
Description: Fire the pistol three times at the same target.
Rating: 4/5
Explanation: Similar to Faceoff this skill is capable of making the pistol a seriously powerful weapon, but instead of attacking multiple enemies the Sharpshooter focuses down a single target. It's a great way to execute a dangerous foe who has come close to the unit.
Specialist

Corporal
Medical Protocol
Description: The GREMLIN can perform healing actions remotely: GREMLIN Heal and GREMLIN Stabilize. The GREMLIN has a single charge.
Rating: 5/5
Explanation: While the medkit is capable of healing teammates, it has very limited range. Medical Protocol is a remarkably effective healing solution. It is a must-have for every squad.
Combat Protocol
Description: Send the GREMLIN to an enemy to jolt them, dealing guaranteed damage, which is increased against robotic enemies.
Rating: 2/5
Explanation: This provides a reliable means for dealing a low amount of damage, which can be useful in situations where an enemy needs to be finished off. It gets a small bonus in potency against robotic enemies which is a nice touch.
Sergeant
Revival Protocol
Description: Send the GREMLIN to an ally to remove any negative mental status effects: Disoriented, Stunned, Panicked, or Unconscious.
Rating: 4/5
Explanation: Status effects can cripple a squad, and there is no more reliable means for removing them than this skill. It's handy to have in many situations, and can mean the difference between a unit surviving or dying.
Haywire Protocol
Description: You may target robotic and mechanical enemies with your GREMLIN, attempting to hack them and seize control.
Rating: 3/5
Explanation: This skill is great for locking down some of the game's more vicious enemies. It is situational since it's enemy specific, but can transform the battlefield in the situations where it is effective. A Skulljack should be equipped to any Specialist using this skill to increase the odds of success on use.
Lieutenant
Field Medic
Description: Equipped medkits have 2 extra charges.
Rating: 3/5
Explanation: This skill is a must-have for any Specialist who chooses Combat Protocol, since they are very medkit reliant. In the case of Specialists with Medical Protocol, it increases the number of chages for the ability, which is great to have in long missions that require endurance.
Scanning Protocol
Description: The GREMLIN can trigger an instant scan of the area, increasing the Specialist's sight radius substantially for one turn, and revealing any hidden or disguised enemies.
Rating: 3/5
Explanation: This skill is best used for countering hidden enemies and avoiding ambushes. It is useful in most missions for visiblity, making it a solid choice.
Captain
Covering Fire
Description:
Rating: 3/5
Explanation: Overwatch is made far more powerful with this skill, as it can trigger on enemies behind cover who don't feel an urgency to move. The Specialist's assault rifle can be upgraded to much more powerful weapons later in the game improving the viability of this skill.
Threat Assessment
Description: Aid Protocol now grants the target a Covering Fire Overwatch shot, but the Aid Protocol cooldown is increased by 1 turn.
Rating: 4/5
Explanation: In addition to the standard benefits of Aid Protocol, this skill will allow a unit to overwatch an trigger on opponents who perform any action, even behind cover. It's very useful for locking down opponents and punishing foes who take any action within visible range. Note that Sharpshooters will defer to their pistol rather than the sniper rifle, so other classes may be a better target of this skill.
Major
Ever Vigilant
Description: If you spend all of your actions on moves, you are granted an automatic overwatch shot at the end of the turn.
Rating: 4/5
Explanation: While the Specialist is most known for its support characteristics, this skill makes it a force to be reckoned with. This will allow a unit to be highly mobile while providing offensive support for teammates. It can be paired with Covering Fire from the previous tier to lock down enemies.
Guardian
Description: With every successful Overwatch shot, there is a 50% chance that another shot will be taken.
Rating: 3/5
Explanation: Overwatch is already a nice way to dish some damage to moving opponents, and this skill can potentially cripple an opponent before they ever lay a hand on you. It's a decent skill with potential to be highly effective in some circumstances.
Colonel
Restoration
Description: The GREMLIN flies to each squad member, healing or reviving them as needed.
Rating: 5/5
Explanation: Healing is very powerful and no heal can save a squad in a pinch more than this skill. It not only will heal injured squad members, but can remove status afflictions, making it a great choice for any Specialist.
Capacitor Discharge
Description: Send the GREMLIN to a location where it emits a substantial electric discharge, damaging and potentially stunning all nearby opponents. Robotic units take more damage.
Rating: 5/5
Explanation: This functions as a long-range grenade with far increased damage capability and the potential to crowd control with a stun. It's one of the best offensive skills in the game, and one that can completely KO a group of opponents provided they are clustered together.