The first raid in Destiny 2, Leviathan, is now live. It brings the most intense experience we’ve seen in the game so far, and there’s a ton of puzzles and tough challenges awaiting you on the Cabal Emperor’s gigantic craft. This guide will show you how to overcome each obstacle, including the Royal Pools and Pleasure Gardens.
Destiny 2: How to Start the Raid

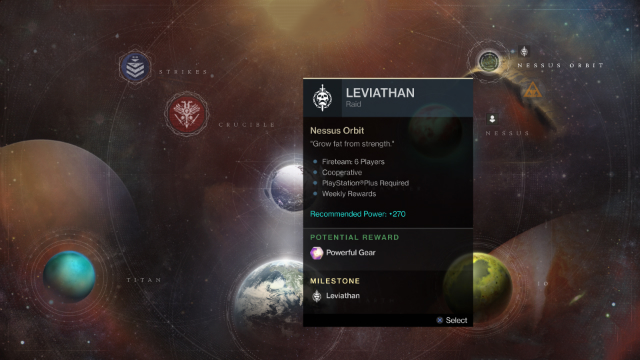
To access the raid you’ll need to select it on the Director. Unlike Strikes or the Crucible, the Leviathan is actually a new in-game location. The vessel appears in orbit around Nessus, and by placing your cursor in that area, you’ll see the info box for the Leviathan raid pop up. You can either start the raid as normal or try the Guided Games beta by hovering your cursor a little bit down and to the left over the orange triangle.
Destiny 2: Leviathan Raid Power Level Requirement and Prerequisites
Leviathan is the hardest quest you’ll face in Destiny 2 as of right now, so it’s understandable that this is extreme endgame content. All the work you’ve put into your character so far has led up to this raid, and you’re going to need to be at least Power Level 270 even to attempt a run. Any lower than that, and you may risk getting a negative modifier to your damage.
While it may be technically possible to solo the raid, your best chance at completing it is to have a full six player fireteam. Additionally, even though 270 is the minimum requirement, all six players should preferably be at Power Level 280 or above.
If you want to get everything you can from the raid, you’ll also want to head over to Nessus and get the On the Comms quest. You can get this randomly by killing Cabal. Fulfil the requirements of the quest (which you can find in your Power Weapons inventory), and it’ll change to Destroyer of Worlds and ask you to complete the raid as your next objective.
Destiny 2: Leviathan Raid Suggested Gear
The most important part of gearing up for this raid is making sure you’re using weapons you’re comfortable with. Just because a weapon might be better on paper, doesn’t mean it’s better in action. However, some firearms have properties that will make fighting the massive amount of Cabal on the Leviathan a little easier.
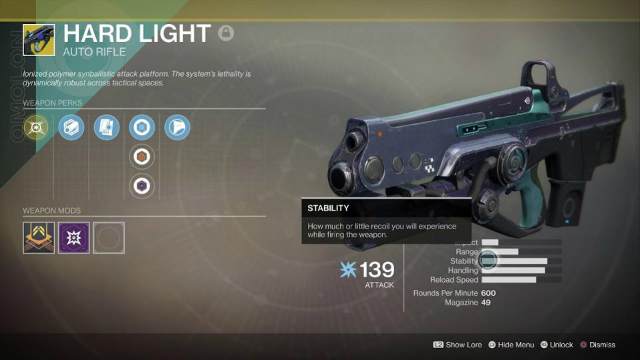
Hard Light

This energy auto rifle is one of my favorites. It has a high rate of fire, penetrating and bouncing rounds and you can change between elemental types on the fly. A great gun for keeping minor enemies at bay and taking down Elite and Major shields.
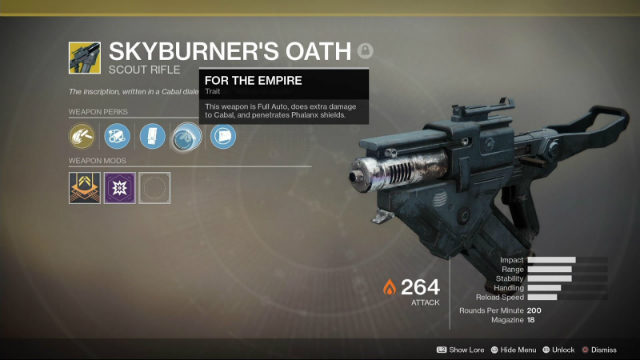
Skyburner’s Oath

This scout rifle has some unique properties that make it perfect for the Leviathan Raid. First, its rounds do extra damage to the Cabal in general. Secondly, and most importantly, its bullets penetrate Phalanx shields.
What armor you equip is more personal preference. I play as an Arc-focused Titan, so I used equipment that helps Arc ability recharge. Use whatever will best augment your offensive capability.
Destiny 2: Leviathan Raid Walkthrough
The Leviathan is a massive ship, and its multiple staircases and levels can get confusing. There are plenty of secrets to be found here, and shortcuts to help speed up your run, but this walkthrough will focus on a standard run to the end.
Gaining Entrance to the Leviathan
When the raid begins, you’ll be facing the golden splendor of the Leviathan. Collect yourself and head straight up the path. The Cabal in front of the giant door won’t attack until you fire first, so take some time to get in position and then eliminate them (or choose not to fight them at all). The bigger guys have my least favorite attack in the game, homing cluster missiles, but you can cheese them if you get flush with the wall beside the ramp leading up to them.
When you take everyone out (or ignore them), your objective isn’t the big door they were guarding, but an area further up. Climb up and head towards the open door to enter the Castellum.
The Leviathan Castellum Puzzle Solution
In the Castellum, you’ll have to capture and defend three standards. Your best bet is to split your fireteam into a group to capture and a group to defend. I’d have four secure the capture point in the middle of the area, and two do the actual capturing.
The standards will appear near three purple circles near doors in the room. When a standard appears, you’ll need to grab it and bring it back to the point in the middle. The catch is if the enemy reaches the central point it resets your progress.
To make each banner spawn, you’ll have to kill three Standard Bearer Cabal. It’s best to do this one at a time. Kill one Standard Bearer, bring the standard that spawns back, and repeat.
Once you’ve captured all three standards, a door will open, and you can get your first loot chest. This one contained a Legendary Engram, an Emperor Calus Token, and a shader for me, but it’s possible it can contain even better loot at random.
Also: Destiny 2 – Best Farming Locations
Leviathan Raid Royal Pools Puzzle Solution
Keep following your quest marker, and you’ll end up in the Royal Pools. In this room, there are five pressure plates, one in each of the pools and then one in the middle. The goal here is to stand on the four plates until the nine lanterns in the room rise high enough for you to destroy them.
To start the sequence four players need to stand on the plates in the pools. The best thing for the remaining two players to do is each to work a side of the room. Making matters more complicated is that the pools are poisoned. When players step on the pad in the pool, they’ll get a Psionic Protection buff that protects from environmental damage, but it only lasts for about a minute. When a player’s buff is about to wear off, one of the two players not on a plate should switch places with the person, who can return to the middle plate to get another Psionic Protection buff and return.
You’ll also have to watch out for Ceremonial Bathers, that will spawn as time goes on. Once all the lanterns are in place, you’ll hear a noise. Now it’s time to run to the central pad and shoot down the lanterns. It’s possible to get this in one go, but with all the enemies spawning, you’ll more than likely have to raise the lanterns a second time to get them all.
Once the lanterns’ flames have been snuffed, a loot chest will spawn with Emperor Calus Tokens and other assorted goodies.

Leviathan Raid Castellum Redux
You’ll have to head back to the Castellum and do the whole banner capturing thing again. The positions of the standards have been changed, and there are a few differences to the layout of the room, but the same tactics from before work.
Once you’ve captured all three standards, a door will open towards The Pleasure Gardens.
Leviathan Raid Pleasure Gardens Puzzle Solution
This section was the hardest for me of any other in the raid. You’ll need to fight your way to the statues and have two of your group pick up orbs. The players with the orbs then need to charge them in the light. Once you have two charged orbs, an opening will be revealed at the base of the statue, and the rest of the fireteam will need to head in and pick up Royal Pollen.
Since everyone is carrying something, that means no one can fight. You’re going to need to head towards the flowers, but there’s a catch. Royal Beasts are patrolling, and these dogs will take you out fast if you’re discovered. So you’re going to have to be stealthy. Avoid the dogs as the orb-bearers scout the area for you. Communication is vital during this part and will make the difference between success and failure.
If the players carrying pollen are seen by the dogs, you’ll be forced into a fight which you will likely lose. Once everyone reaches the flower, those with the orbs will need to discharge their orbs at the flower. This will give players holding the pollen a strength buff which maxes out at 60 stacks.
Now that the team is buffed, you’ll have to search out the Royal Beasts and kill them. Once you hit the first beast, a one-minute timer starts. If the timer reaches zero, everyone outside of the area with the statue, orbs, and pollen will die. Your best bet is to damage several of the dogs at once instead of concentrating on one. You’ll likely have to repeat the pollen carrying process at least twice, but if you damaged all the dogs roughly equally then, you could set it up to where you can kill most of them at the same time.
Note, you do only have three tries to kill the Warhounds. After that, the safe room locks and you’re forced onward without receiving the loot chest.
Once you take out all the beasts, you’ll get a loot box and an Irrigation Key. Now it’s time to head back to the Castellum.
Leviathan Castellum the Third
A few things have changed again, but the same strategy applies.
Leviathan Raid Gauntlet Puzzle Solution
When you get to The Gauntlet, jump on the round platforms and enemies will begin to spawn. If you look at the pillars in the room, you’ll see that there are meters than fill as you kill Cabal. Eventually, two orbs will appear. Have two members of your fireteam split off and grab them. Once they grab the orbs, they’ll be teleported into the tunnels surrounding the arena.
The two players in the tunnels need to sprint through the gates with circles on them. Each gate will have a red circle amongst the rows, and the runners in the tunnels will need to pass that info to their fireteam outside. Players outside have to shoot at the two rows of glowing triangles on their corresponding gate that match the rows that DO NOT have a red circle. Doing that opens the gate in the tunnels and allows the runners to meet up and put their orbs into an energy spring.
Repeat this process three times, and your whole team will be able to get orbs from the center of the area. Once everyone grabs an orb, you’ll all be in the tunnels. Make sure every fireteam member jumps through a hoop with an orb at least once as you race through.
After you make it out, deposit the orbs and you’ll have completed The Gauntlet.
How to Defeat Emperor Calus
It’s time to take on the big man himself. When you enter the throne room, you must shoot the cup out of his hand to start the battle. Enemies will begin spawning in the room that you’ll have to take down. Soon Calus will transport three players into a purple room to fight a giant hologram of his head. The other three players will remain in the throne room to continue fighting enemies.
When part of the fireteam is transported to the purple area, four Psions will appear in the throne room, and each of them will have a symbol above them. It is vital you don’t kill them yet. Each of the players in the purple area will see a different symbol on the Emperor’s forehead. Each of the players in the purple room must relay what symbol they see to the team in the throne room. The Psion who has a symbol that wasn’t called out must then be destroyed.
Once the Psion is destroyed the barrier around the Calus head in the purple area goes down. The head will then start shooting projectiles, which the players must avoid. After he gets done shooting, orbs will appear that players can use to head back to the throne room. Once everyone is reunited, look for a glowing platform. The whole fireteam needs to jump on it to receive the Force of Will buff. Battle Calus until you can’t do damage anymore and then move to the next glowing platform and open fire again. Keep shooting him till he’s invincible and jumping to new platforms until he goes down. Once he’s defeated the raid is over, you’ve won!
Destiny 2: What to do with Emperor Calus Tokens and how to find Benedict 99-40 Location

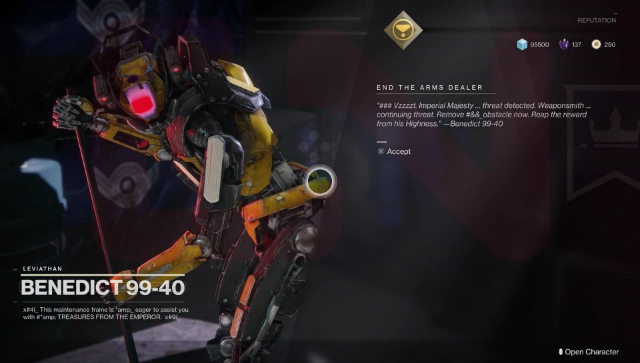
Well, you finished the raid, and you have all these new tokens and no one to give them to, right? Wrong, there’s a new NPC in town, Benedict 99-40. You can head over near Ikora Rey in the Traveler hub to find him.
Benedict 99-40 will take Emperor Calus Tokens, and it works just like everyone else. He has some unique new items in his inventory, so you’ll definitely want to check him out.


