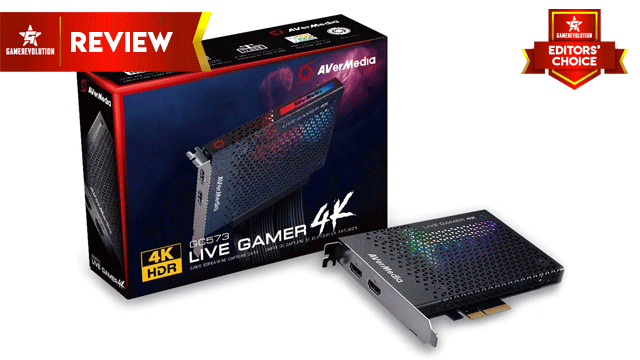
The Avermedia Live Gamer 4K aims to be the ultimate capture solution for gamers. If you’re an enthusiast who wants to record the latest games at 4K 60 FPS with HDR enabled, while supporting full pass-through to a TV or monitor, then this is likely the perfect product for you. After spending one month with the Live Gamer 4K, using it to both capture and stream gameplay every single day, I’m finally ready to give my verdict.
Avermedia Live Gamer 4K Review – Checks All the Boxes
At $300, the Live Gamer 4K already has a win under its belt. Compared to other 4K 60 FPS capture devices on the market, which includes the $380 Elgato 4K60 Pro and other more expensive “professional” options, Avermedia’s latest flagship capture card boasts a huge number of features at a palatable price tag. If you’ve got the hardware to power this desktop-only internal card, the Live Gamer 4K can capture pristine 4K 60 FPS video with HDR enabled, which is truly a huge accomplishment at this price point.
Top-tier 4K support should be enough on its own to grab the attention of enthusiast content creators, but there is also support for higher frame-rates at lower resolutions. 1440p can be captured and passed through at up to 144 FPS, while 1080p allows for up to 240 FPS. This is great for video platforms that output content at over 60 FPS, or for montage makers who want to get super smooth slow motion effects in less demanding games like CS:GO or Overwatch. It also helps future-proof the device, further earning the investment.
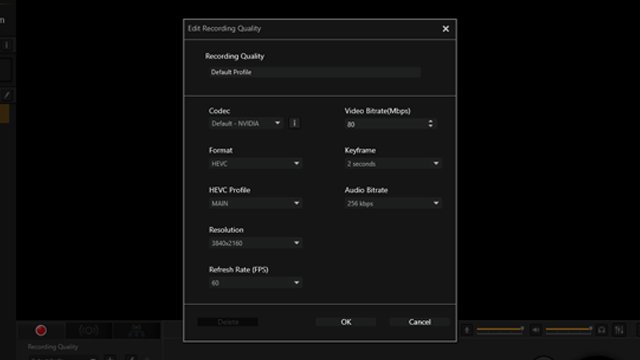
Available bitrate goes all the way up to 240 Mbps within the first-party software, though OBS and other applications can take things even further. The default setting for 4K 60 FPS HDR is 150 Mbps, but I turned this down to 80 Mbps for use on YouTube. While it’s nice to have the option of higher bitrates, users who are uploading to video sites can aim for much lower. Again, though, it’s nice to keep things future-proofed for further down the line.
All of the capture is done using a HDMI 2.0 input, which offers enough bandwidth to support the various combinations of resolution, frame-rate, and HDR. Pass-through to a TV or monitor is done through the HDMI 2.0 output, with no noticeable impact on latency. It is also possible to view a practically lag-free preview on the capturing system, so you don’t technically need to pass through to another TV or monitor, but for anything but the most casual players enjoying slower games, you’ll definitely want to pass through the signal for the lowest possible delay.
For the price, when compared to the other options out there, the level of functionality offered by the Live Gamer 4K is very impressive indeed, giving it a big lead. For now, it’s untouchable!
Avermedia Live Gamer 4K Review – A Solid Hardware/Software Combo
The hardware itself is built well and feels like quality. It has enough heft to satisfy in the hand, without any concerns for stressing your motherboard. It’s entirely black, save for the RGB logo which has disappointingly limited customization within the software. There are only a few available color combinations, none of which looked good in my red-themed setup. Hopefully the selection will be expanded in the future, as making it match internal lighting would be a great bonus.
Installing the Live Gamer 4K couldn’t be simpler. It took only a few minutes to open my PC case, slide the Live Gamer 4K into a spare PCIe 4x slot, and install the drivers. This all went as smoothly as possible. If you’ve previously installed a graphics card (which is required for full compatibility), then you’ll have no trouble here.

Next, I had to deal with the software. While previous iterations of RECentral have caused me headaches, the latest version seems to have finally got everything right. Not once did I experience any sudden crashes or lost recordings. Sure, there are the odd lengthy loading times when switching between settings, but once my profiles were set up, the delays became a non-issue. RECentral 4’s initial set of menus provide just enough control to get going. Advanced users can then dive deeper into the wider range of options, and tweak things further.
Though RECentral 4 now has its own capable capture and streaming functions, I imagine many Live Gamer 4K buyers will ultimately turn to OBS Studio as their software of choice. Happily, the device is fully recognized and supported in OBS, with the exception of HDR recording, which is currently only available within RECentral. I personally use OBS Studio for recording and streaming non-HDR content, as I have my various scenes and profiles already set up, and I also like to take advantage of the Replay Buffer for flashback recording. If I want to grab some awesome HDR footage, then I’ll open up RECentral 4 and capture that way.
Avermedia Live Gamer 4K Review – Read the Requirements!
If you’re hoping to edit that glorious 4K 60 FPS HDR footage which you just spent $300 to capture, you will want to ensure that your editing software of choice supports it. I’d recommend researching before buying the Live Gamer 4K, as different applications handle the HVEC codec more successfully than others. Avermedia does include CyberLink PowerDirector 15 with the product, but I failed to get it working with HDR files. Adobe Premiere Pro, however, happily accepted the HDR content, allowing me to make cuts, and render out all of the videos embedded within this article. (Note that you will need a HDR-compatible device in order to select the “2160p HDR” option on YouTube!)
Compatible software is only a small part of the 4K 60 FPS HDR recording puzzle, as you’ll also need to make sure your PC hardware is powerful enough. Avermedia makes it easy to know whether your system is up to the task with this handy utility.
For 1080p 60 FPS capture, you can get away with surprisingly low system requirements. However, for that sweet, sweet 4K 60 FPS HDR or 1080p 240 FPS recording, you will need an Intel i5-6XXX or above, or the AMD equivalent. You will also need to be using an Nvidia GTX 1060 or above, paired with at least 8 GB of RAM. The Live Gamer 4K worked flawlessly with my AMD Ryzen 7 1700 paired with a GTX 1070, but failed to capture 4K HDR with a high-end AMD graphics card. NVENC is likely leveraged here, so Nvidia is the only way to go for best performance and access to all features.
Avermedia Live Gamer 4K Review – A No-Brainer for Content Creators
For capturing 4K 60 FPS HDR PS4 Pro, Xbox One X, or dedicated gaming PC (in a two-system setup) footage, the Live Gamer 4K is the best and cheapest current option. So long as you’re aware of the system requirements and research your editing software beforehand (Adobe is fine; others may differ), you should enjoy a headache-free capture solution that pretty much does it all. It gets a hearty recommendation from me, and is now my personal daily driver when it comes to streaming and capturing.
If $300 is out of your budget, or you don’t need quite so many fancy features, Avermedia has also launched the new Live Gamer Ultra and Live Gamer Extreme 2, which forgo the more advanced features for a lower price.
Live Gamer 4K review unit was provided by Avermedia.


