NieR: Automata isn't necessarily a challenging game, but its "third playthrough" (Route C) certainly could be labeled as such. Made available after finishing the game's first two routes, it's a huge jump up in difficulty over the prior two playthroughs, which comes as a shock to many players.
In this guide we're going to go over what you can do to get ahead during your third playthrough in the interest of fully completing the game and its 26 endings.
For those of you who might be on your first or second playthrough, or simply want to avoid spoilers, this guide's material won't mention any story elements. We'll avoid any specifics unless necessary.
Let's get to it.
Time To Upgrade
The first thing you're going to want to consider is upgrading your two primary weapons to level 4. The enemies on Route C have massive health pools, especially the bosses. Without at least one level 4 weapon you're going to at least double the length of encounters.
During some portions of your third playthrough you won't be able to access the Resistance Camp blacksmith, which means that you will be in a tough spot if you haven't already upgraded at least one weapon to level 3. If this is the case, progress as best you can until a character swap occurs, at which point you can speak to the blacksmith.

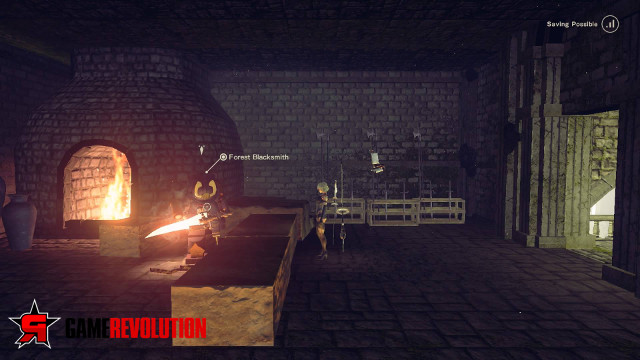
When you're ready, you can visit a secret room in the Forest Castle to perform the final upgrade. Note that this will require several rare materials, most of which can be farmed from small and medium machines around the game world.
In regards to which weapons are best for leveling up, every weapon is reasonably balanced. That said, all small swords, greatswords, and spears are generally considered the best of the bunch.
Grind It Out
Unless you spent a lot of time killing optional enemies during your first two playthroughs, you're going to be underleveled during Route C. Enemies at this point are between level 50 and 60, which is likely 10 or more levels beyond where you're at. Combined with the high probability that you don't have level 4 weapons, or the materials to upgrade them, you have the perfect recipe for disaster… and opportunity.
Grinding is in order at this point. Head out into the open world and jump from one group of enemies to another killing everything you see, all while hoping for the materials you need for your weapon upgrade. While evening the playing field by getting to level 50 is probably unrealistic, it is recommended that you try to hit level 40. This, along with an upgraded weapon or two, will give you plenty enough potential to defeat everything coming your way during Route C.
Stock Up
You are probably getting low on restorative items, especially after the ending sequence of your Route B playthrough. You might have noticed that you don't have access to the item vendor in the Resistance Camp. Thankfully, there's another option.
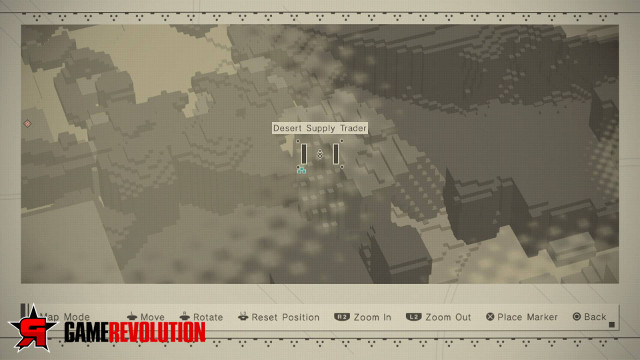
Simply teleport near the Desert entrance and visit the Desert Supply Trader to stock up on items. You're probably going to want to max out your supply since you're going to be healing a lot during Route C. Medium restorative items are best if you're short on money.

On that note, consider selling any chips you don't think you'll use as well as any items that have a description that makes mention of how they can be sold for money. These items serve no purpose other than for selling, and some of them are worth tens of thousands.
While you're at it, pick up some damage boost items, preferably the Large ones that last 30 seconds. These will help you kill faster, which is hugely important.
Bet Your Chips
Your chip setup is important to your success during Route C given the level of difficulty. Your investment in setting up a nice loadout is well-worth it.
When setting up your chips it's advisable that you go with an offensive oriented build. The defensive chips are usually less impactful, and you can rely on inexpensive restorative items to keep yourself alive anyway.
It is at this point that you may want to consider upgrading your chips. Several high quality chips can be purchased at a vendor driving around on a motorcycle between the Resistance Camp and the Desert.
The Dreadful Sequence
There are a lot of tough sections during Route C, but there's one in particular that is notoriously difficult. It comes toward the beginning of the third playthrough, and it is one of the most common sources of frustration in the game.
This sequence effectively asks you to travel from point A to point B with some mobility issues to make everything harder—I'm trying to avoid spoilers here. You will likely fail during your first attempt as you run out of time, or can't find a suitable route to get where you need to go.

The best way to complete this sequence is to head toward the Resistance Camp and then left. Then, jump the small gap when you are able to move at full speed. Once you make it to the other side, you're golden.
The key here is to avoid going through the City Ruins, as there is no safe route to your destination despite it appearing that way on the map.
Tone It Down
When all else fails, consider dropping the difficulty setting to Normal or Easy if you need to. The mechanics of Route C are unfriendly enough to warrant this. You can do so in the Settings menu without any repercussions.
If nothing else, you already beat the game on a higher difficulty, and playing on Hard or Very Hard won't net you any rewards, not even an achievement. Why not have some fun?

Check Out More NieR: Automata Coverage:


