In Subnautica you’ll constantly be questing for resources. Progressing into deeper biomes and getting the means to keep yourself safe take massive amounts of the various minerals, metals, and organic materials available in the game. As you get further in things are made more complicated by advanced material crafting which consumes a massive amount of both rare and basic resources. Getting ahold of a vast amount of Titanium, Copper, Gold, Silver, Lead, Diamonds, Lithium, Magnetite, Gel Pods, and all the other common building blocks of your technology fast lets you feel much more comfortable in your underwater abode. Below we list the steps that let you farm resources quickly and efficiently in Subnautica and what you need to do to accomplish them.
Subnautica: Preparing to Farm Resources
Unfortunately, you can’t just start farming resources as soon as Subnautica starts. You’re going to need to progress quite a bit in the game before you get the technology and capabilities you need to make resource gathering easy and quick.
1. Make the Seamoth
Your first objective upon starting the game should be to collect the blueprints for the Mobile Vehicle Bay. You can usually find these in and around wrecks in the Safe Shallows biome you start in, in the Kelp Forest biome bordering the Safe Shallows and the edges of the Grassy Plateaus biome you’ll find bordering the Kelp Forests.
Once you collect the three Mobile Vehicle Bay blueprint fragments you can build it using one Titanium Ingot (10 pieces of titanium), one Lubricant (made from a Creepvine Seed Cluster), and one Power Cell (two batteries and a piece of Silicone Rubber [also made from Creepvine Seed Cluster]).
Once you’ve built the Mobile Vehicle Bay, you need to make a Seamoth. There’s a pretty good chance you found the blueprints for this while you were looking for fragments for the Mobile Vehicle Bay, but if not you can find them in and around the wrecks in the Grassy Plateaus. The Seamoth takes one Titanium Ingot, one Power Cell, two pieces of glass (made from Quartz), one Lubricant, and one Lead to construct.
2. Raid the Aurora
More than likely by the time you’ve built the Seamoth the Aurora has already exploded. If so, good, you’re ready to make the Radiation Suit and explore it. If not, just wait for it to explode. Once the Aurora explodes, you’ll automatically get the plans for the Radiation Suit. To fabricate it you’ll need four Creepvine Samples (cut Creepvines with your knife), so you can make two pieces of Fiber Mesh, and two pieces of Lead.
Before you head to the Aurora, you’ll want to get a few things together. In addition to the Radiation Suit, you’ll want to bring your knife, fire extinguisher, repair tool, laser cutter, and a Propulsion Gun (you can find the blueprints for this past the Grassy Plateau biome in the Mushroom Forest.)

You can approach the Aurora from the front and find a ramp on the left side of the ship. Once you climb the ramp, you’ll find a door with some obstacles and once cleared you can head into the ship. Search the ship thoroughly and grab everything you can.
The essential items to get on the Aurora are the Seamoth Depth Module MK1, Prawn Suit Fragments, and Cyclops Engine Efficiency Module. You can also scan a Cyclops Engine fragment in the Cargo Bay, but you’ll find plenty more of these soon. Also, repair the radiation leaks in the drive room to make traveling a bit easier in the future.
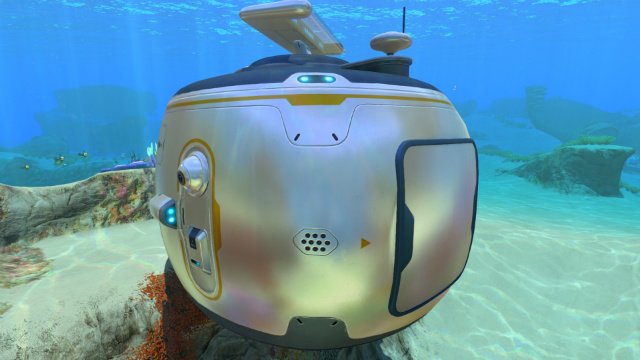
3. Built a Cyclops
Now that you’ve got the Seamoth Depth Module MK1 you can reach the areas you need to find the Cyclops blueprints. There are three different blueprints you need to find to construct the Cyclops, and each design has three fragments for a total of nine things you have to scan. Luckily you can find them all in the Mushroom Forest.
Your best bet is to find a safe area in the Grassy Plateaus biome and build a base. This way you’ll be close enough to make expeditions back and forth less of a hassle.
Search around the Mushroom Forest floor and explore the wreck there and you’ll eventually find all nine fragments you need. Then it’s time to get out your Mobile Vehicle Bay again.
The Cyclops takes a ton of resources to create, though it’s very worth it.
To build this large submarine, you’ll need:
- 30 pieces of titanium (to make three Titanium Ingots)
- 6 pieces of lithium (two to each Titanium Ingot to make Plasteel Ingots)
- 6 pieces of quartz (to make three pieces of glass)
- 3 Stalker Teeth (one to each piece of glass to make Enameled Glass)
- 1 Creepvine Seed Pod (to make one Lubricant)
- 2 Copper (to make a spool of Copper Wire)
- 3 Gold (one for the CPU and two for the Advanced Wiring Kit)
- 2 Silver (for the Wiring Kit)
- 2 Table Coral Samples (for the CPU)
- 3 Lead
Once you have the Cyclops resource management becomes incredibly easy. Make sure to build a battery charger and a few lockers on board and load up the materials you need to build a base foundation, an X corridor, a scanner room, a solar panel, and a hatch. Ideally, you should also have two Scanner Room Range Upgrades, a Scanner Room Speed Upgrade, and most important of all the Scanner Room Hud Chip. You’ll need Magnetite for these so you may have to venture deeper and further than you’re used to before you have the resources to craft these upgrades.
Farming Resources in Subnautica
So now you have your Cyclops and the resources inside to make one or more small scanning bases. You now have all you need to start farming materials. For your initial farming session make sure you pick an area that’s above 200m to construct your base. Solar Panels don’t work below a certain depth, and you want to make sure they’re getting enough sun to power your base. This is only a temporary issue, but until you get the resources flowing the solution is a bit too costly.
For your first farming location, your best bet is to pick a location in a biome that’s reasonably safe, and has Shale and Sandstone Deposits. The Mushroom Forest near the dropoff into the next, deeper biome is a good place. You can build your base high in the Mushroom trees, and no predator is likely to disturb you. Just make sure you’re not too close to the edge of the biome that the Crabsquid likes to roam around in.
Once you find the place that’s right for you, build a base consisting of A foundation, an X corridor, a scanner room, a solar panel, and a hatch. Once it has power climb aboard and put your scanner room upgrades into the right slots and get ready to farm.

You can use the scanner room to sweet a large area for the resource you select. When you pair this ability with the Scanner Room HUD Chip, you’ll have every node the scanner picks up tracked right on the HUD. All you have to do then is go pick it up. This is the best way to get a huge cache of resources during the mid-game.
You’ll start racking in more common resources like this, and soon you should have a sizable store of gold, silver, lead, copper, lithium, and diamonds. The best way to get titanium is to scan for metal fragments that you can bust down into four pieces of titanium apiece with the Fabricator.
Eventually, you’ll want to build a PRAWN suit with a drill arm. Once you have that you can scope out the large resource deposits with the scanner room and that will be the fastest way to farm for the material you need. Once you have enough gold and titanium stocked up, you can start building your scanner room bases even deeper by planting a Thermal Power Plant in a hot location and running Power Transmitters where you need them.
(WARNING: If you don’t remove your upgrades before deconstructing a scanner room you will lose them!)
Using the method above, the only resources you should run short on are the rarest in the game which can’t be farmed like the more common ones can.


