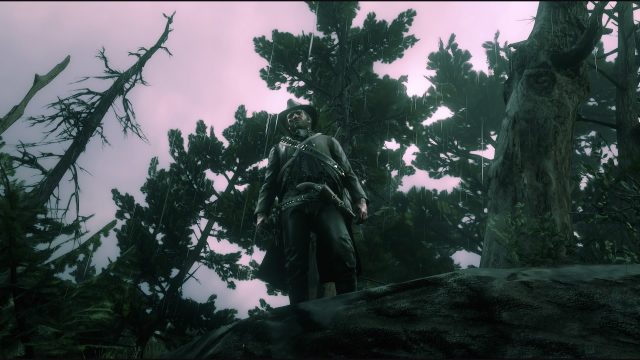
Red Dead Redemption 2 is still riding high in the charts, as players comb through New Orleans in search of action, adventure, and of course, treasure. You always need to make a lot of money in the game if you want to pay off bounties, buy upgrades for your camp, or just get yourself a less-dead horse, and a good way to get a ton of cash quickly is with the Red Dead Redemption 2 High Stakes treasure map.
The Red Dead Redemption 2 High Stakes treasure map is one of the few treasure hunts in the game. It’s a little less difficult than the Jack Hall Gang treasure map mission, but can be a little harder to get hold of in the first place. Still, it’s very lucrative. We’ll show how to get the map, all the various treasure chest locations around New Orleans, what you get for completing it, and what to do with that.
Where to Get the High Stakes Treasure Map
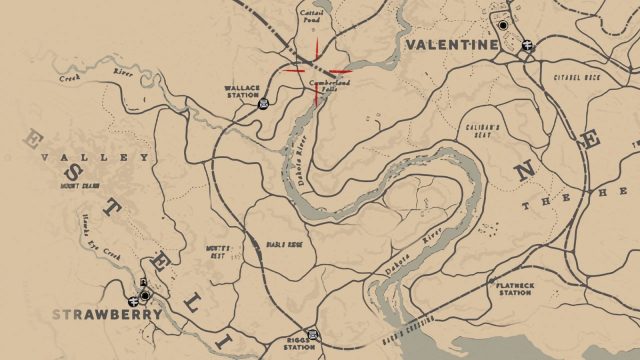
One of the toughest parts of the Red Dead Redemption 2 High Stakes Treasure Map mission is getting hold of the map in the first place. It’s actually a random event, and you may need to be on to Chapter 3 before you can get it at all. You can get it through a Stranger side-mission that will appear on the map, but as it’s a random event it’s a bit more difficult.
You’ll need to be exploring the area between Valentine and Strawberry in order to make the event happen. The Stranger is most likely to appear in the surrounding area around Cumberland Falls, Wallace Station, and where the Diablo River is marked on the map. Keep riding around and you’ll eventually find a bearded and rather rough-looking treasure hunter. He’ll be carrying a treasure map, but he’ll ping on your map. Approach him, greet him… and the dude will run off, yelling at you. Lasso him, tie him up, and loot him for the Red Dead Redemption 2 High Stakes treasure map. You can then either let him go, kill him, or leave the cursing hunter tied up.
Incidentally, if he gets away from you, or you’ve been doing something else when you encountered the guy and couldn’t go after him, don’t worry. You’ll have two more chances to encounter him and catch him. If you lose him three times, then simply head to one of the four Fences in the game (Rhodes, Saint Denis, Van Horn Trading Post, Emerald Ranch) and the first treasure map should be there to buy. It’s pretty cheap fortunately, but then it’s cheaper to catch the treasure hunter in the first place, of course.
Red Dead Redemption 2 High Stakes Treasure Map Location 1
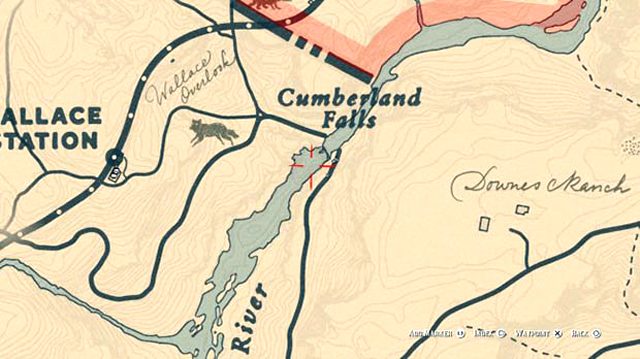
If the first map shows a familiar scene, it’s because you should be right next to it, assuming you didn’t buy your map from a Fence. It’s Cumberland Falls, right next to Wallace Station and a short way west of Valentine. The arrow on the first treasure map points to the right (east) side of the falls, with you facing it, so head there and either stick to or cross over to the right. You’ll notice a fallen tree sticking into the waterfall here. Get on and walk across this log bridge and it’ll lead you behind the waterfall into a cave. Head to the back of the cave and you’ll find the second part of the High Stakes treasure map hidden behind a rock. Examine the area and you’ll be ready to tackle the next part.
Red Dead Redemption 2 High Stakes Treasure Map Location 2
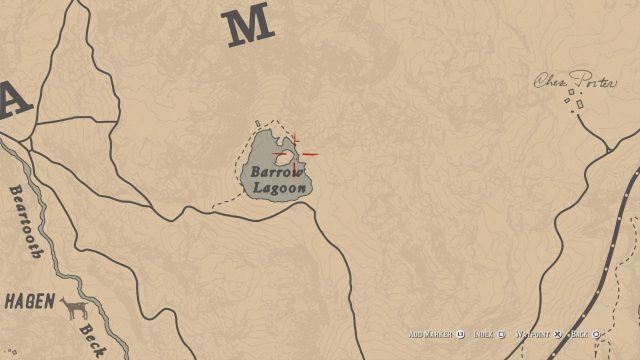
The second treasure map shows a lake next to a hut and a mountain. Not much to go on, but luckily we’re here to help. The lake is actually Barrow Lagoon, east of Mount Hagen in Grizzlies West, and it’s directly north of your previous location at Cumberland Falls (and north-west of Valentine). It’s pretty far north though, nearly to the chilly area you started the game at, so make sure you have your warm coat with you (we’re not joking, that matters in Red Dead Redemption 2).
You’ll find the lagoon is actually frozen over at this point. That white island in the center of the lagoon is in fact a large round rock, which you can see in both sections of the second treasure map. The treasure is just behind it, between the rock and the hard place (or mountain, more accurately). You’ll see another snow-covered log bridge between the mountain and the rock. Head around and on to the log. This time what you’re looking for is actually on the log bridge itself. Halfway across it you’ll spot a hole. Examine it and you’ll find the third and final treasure map.
Red Dead Redemption 2 High Stakes Treasure Map Location 3
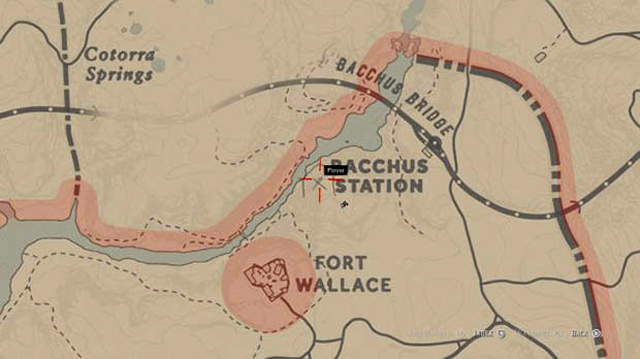
This is the hardest one to get, which is appropriate since it’s for the High Stakes treasure itself. The third map shows a winding path between two mountains, near some sort of fort. This is Fort Wallace, near Bacchus Station, and it’s directly east of your previous location at Barrow Lagoon. You can take that winter coat off now. The treasure is tricky to find, but it’s very close to where you found the rock carving for the Geology For Beginners hunt, if you’ve done that one.
Head up the big hill to the left of the words Bacchus Station. Head down the path on the right side facing the bridges, past a single tree. Head down and left, on to the rock shelf. If you haven’t got the rock carving it’s right here. Head up, and drop down at the end, and again, and then jump up a ledge and crouch around the corner. There’ll be a little hole here in the rocks that you can examine, so keep an eye out for it.
Inside you’ll find three gold bars. These can be sold at a Fence for $500 each, so you’ll be $1,500 richer once you do. We told you this quest would be lucrative. Now, did we remember to untie that guy? We’re sure we did…
