
Building is one of the best parts of Valheim. The game’s immense crafting system allows for a lot of creative opportunity when putting together structures such as homes, boat houses, gardens, and more. However, the game doesn’t provide much help when it comes to building supports, foundations, and roofs. Since you’ll need your structure to be sturdy, you’ll want to learn how to build a solid foundation and a roof that won’t break. Fortunately, we can help with that.
Valheim | Building supports and foundations
Every building in Valheim must have a foundation, and every building’s roof needs a support structure. Floor tiles coupled with wood beams form a solid foundation, while walls and upright beams help support the roof. Both rely on each other: Without a proper foundation in place, roof supports will fall down and break. Without a roof, buildings won’t provide shelter from the elements, and floor panels will rot.
In other words, you need to think of buildings not as individual pieces, but as entire units. Structural beams supporting the roof count for little without a foundation and vice versa. But when placed together, these elements form a stable structure that can support other building pieces — assuming their support strength is high enough.
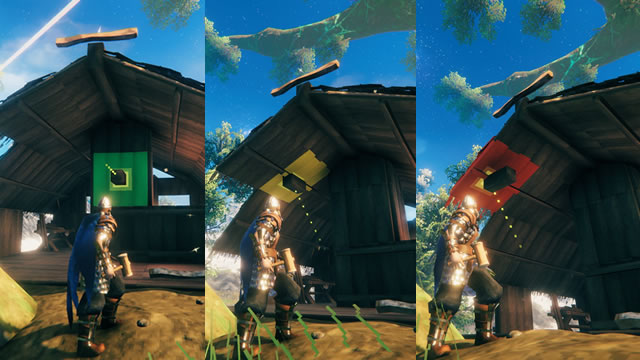
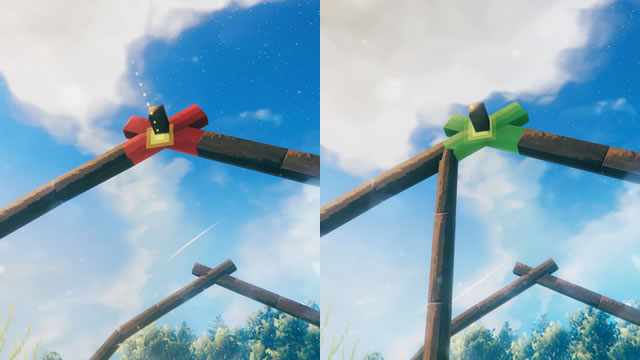
Fortunately, there’s a simple color coding scheme to help you see whether or not a structure can support another building piece:
- Red highlights mean the piece cannot support another structure
- Yellow highlights indicate weak support
- Green highlights indicate strong support
- Blue highlights indicate total support (the structure is directly connected to the ground)
With all this in mind, it’s best to begin building from the ground up. The first step to building a stable structure is to establish a stable foundation, while the second step involves creating roof supports with beams and walls.
Step One: Building a Foundation
Before you begin building, you’ll want to clear and level the earth. You can level ground using the hoe — try to clear a patch slightly larger than the structure you intend to build.
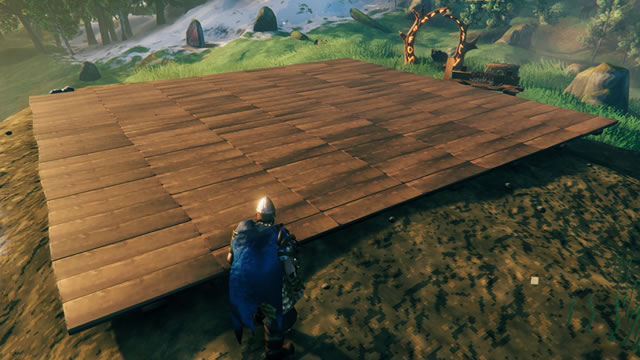
After that, begin placing floor panels. Start by placing floor panels where walls will be, then fill in the middle spaces once the outside frame is done. Keep going around until you have a complete floor.
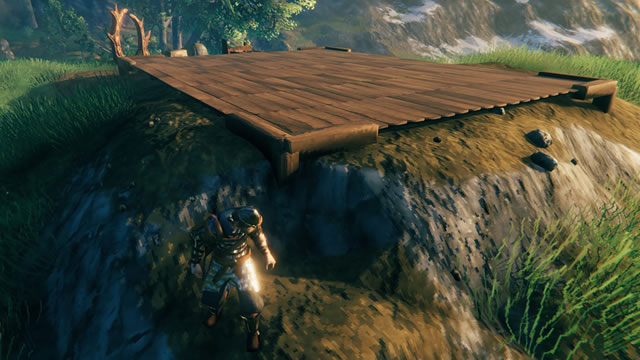
At this point you should strengthen the floor by bracing it with wooden beams. Horizontal beams should line the outside edges of the floor, and vertical beams should anchor the floor to the ground. Vertical beams are particularly useful if you’re building in high locations where the structure hangs over the edge of any cleared terrain.
After the basic foundation is established, each floor piece should highlight in either blue or green. Ideally, all floor panels will highlight blue, meaning they’re in direct contact with the ground. Of course, this won’t be possible with houses built on stilts or uneven terrain.
Once the foundation is established, you’re ready to move on to the next step: Building support structures and framing the roof.
Step Two: Building Support Structures and Roof
This is the hard part. Building roof supports in Valheim can be a bit tricky, especially with structures featuring odd-shaped floor plans or alternating wall heights. Still, in a nutshell, you want to make sure each roof tile is properly anchored to either the foundation, a wall, or a beam.
Walls alone are capable of supporting the roof on a smaller home. You can typically place three roof tiles onto one another before the next will fall and break. That means your house can only be six tiles wide before the roof needs additional bracing. If you want to stretch a roof longer than that, you’ll have to brace it with wooden beams leading either to the foundation or the walls.
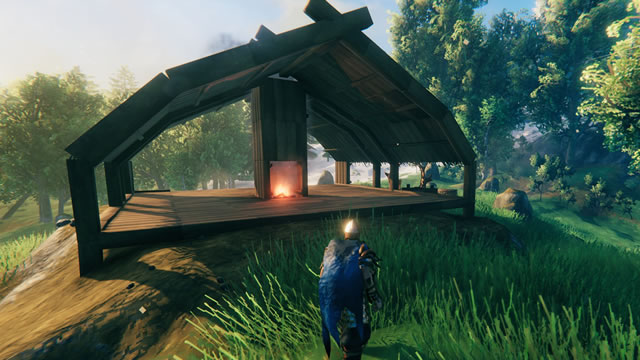
Luckily, there is one special trick you can use: Build a chimney right in the middle of the house. The walls of a standard single-tile chimney will provide extra structural support to the roof. A central chimney will allow you to build a structure up to seven tiles squared without having to place extra vertical beams within. Plus, it ensures that the entire house is “covered” by the comfort radius of the fire.
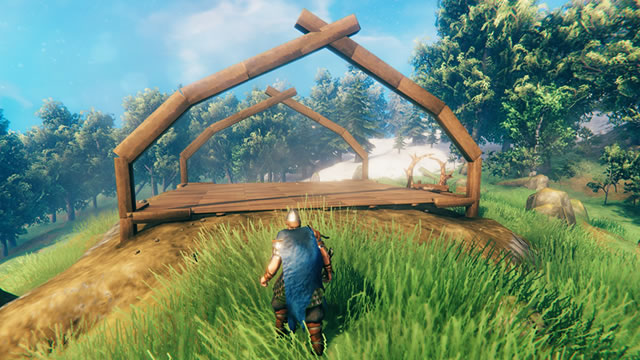
Frame the roof with beams and arches
Assuming you aren’t capable of simply using walls to frame a roof, you’ll need to build support structures. These are created with wooden beams, either vertical, horizontal, or slanted. These follow the same rules as roof panels: You won’t be able to place more than three in a row before they’re too weak to support anything. Once you place the third beam, you need to anchor it either to another beam, the wall, or the floor. (Vertical beams are the exception: They can be stacked up to 16 meters high without falling, or 20 meters for core wood beams.)
How you choose to support your roof is up to you. Get crazy with the beams; there are plenty of artistic opportunities to be found. Just make sure that each beam is highlighting either green or yellow before you move on to the next.
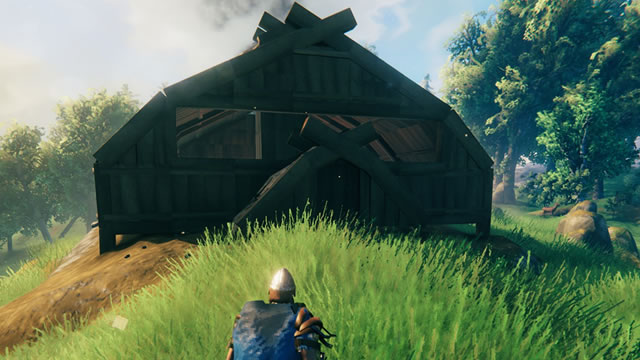
Once the roof supports are in place, begin placing roof panels from the walls up to the ceiling’s apex. After you reach the peak of the roof, use arch pieces to complete the roof frame. If you’ve got an especially wide building — or if you don’t intend to use a central chimney as a structural piece — you’ll probably need to reinforce the roof with additional vertical beams as mentioned above.
Step Three: Finish the Building
With the foundation and a strong roof support structure in place, the hard part is over. All that’s left is to place walls, windows, doors, and decorations. All interior walls will be anchored to the foundation, so they should be completely stable. Plus, any walls you place that reach up to the ceiling will add to the roof’s structural integrity. In time, this extra stability will allow you to add additional rooms, an upstairs loft, and so on.
That’s how to build supports, sturdy roofs, and stable foundations in Valheim. Be sure to remember the color coding system so you’re never left with a roof that will fall and break. Now that your home is both strong and safe, be sure to check out our Valheim best weapons tier list. If you’ve already stockpiled valuables, here’s how to find the merchant Haldor plus tips on how to get Megingjord to increase your carry capacity.


