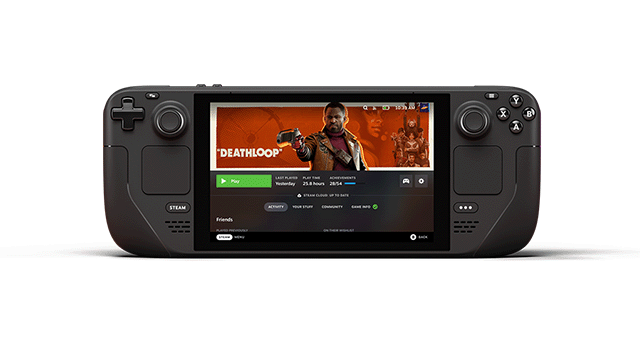
The main difference between the three models of the Steam Deck is the size and type of storage used. Potential buyers might wonder if they can purchase a 64GB version and install a larger hard drive. We’ll cover just what the options are when it comes to upgrading a Steam Deck SSD below.
Can you install a larger hard drive in a Steam Deck?
Yes, users can install a new hard drive in a Steam Deck. Even the 64GB version that comes with eMMC storage can be upgraded with a brand new SSD. However, there are some caveats to this that might make users think twice about switching out the SSD:
- Not just any SSD will work.
- The SSD isn’t readily accessible.
- It has a Micro SD slot.
Not just any SSD will work
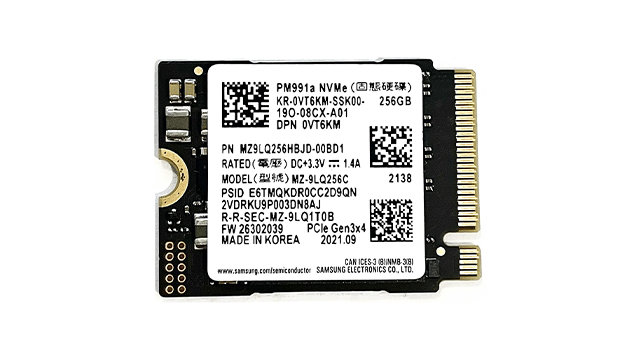
Most consumer-grade M.2 SSDs use the 2280 form factor. This means they’re 22mm wide and 80mm long. However, the Steam Deck uses the much smaller and rarer 2230 form factor. This means those who want to replace the SSD in their device will have a much, much smaller range to choose from with lower availability.
Right now, on Amazon, there are only 128GB and 256GB 2230 SSDs to choose from. To get larger sizes, users will have to use eBay, and sellers on there have priced the 512GB and 1TB drives exorbitantly high because they know they’re in demand.
Valve also cautions that the Steam Deck was built with a particular SSD in mind. So, using one with higher power consumption or that generates more electromagnetic interference might cause the unit to not behave normally.
The SSD isn’t readily accessible
Getting to the Steam Deck’s SSD isn’t an easy task (we’ll describe it in detail below). It requires users to remove the rear panel and the battery, which isn’t something that most people are going to feel comfortable with. Thankfully, there’s no soldering required, but most users won’t want to risk damaging the delicate ribbon cables. Furthermore, after replacing the SSD, users have to install the OS again, which requires a bit of technical know-how.
It has a Micro SD slot
The Steam Deck already has an easily accessible way to expand the storage in the form of a Micro SD card slot. Users can just slot in an up to 1TB Micro SD card and the Steam Deck will automatically detect it and format it if necessary. Sure, it’s not as fast as NVMe storage, but it’s fine for installing and playing games.
How to install a new SSD into the Steam Deck
Okay, so even with the caveats, some users will want to proceed and install a new SSD into their Steam Deck. We’ll break down the steps needed to do so here. For further instructions and illustrations, this guide by u/CyrexArtwork from Reddit is very helpful.
The process to remove the old SSD and install the new one are:
- Remove the four long screws from the outside corners of the Steam Deck
- Remove the four small screws from the middle.
- Once the screws are removed, pry at the top middle of the case with a plastic tool. Make sure to only shallowly insert the tool to ensure that it doesn’t damage the circuit board or any ribbon cables.
- When the top separates from prying, stop, and then start prying at one side. There are clips holding the rear shell on, so be careful not to break them.
- Once the rear is removed, look for the metal shield covering the battery. It’s located next to the fan. There is two small screws in the top left and bottom left corners and a large screw. All three need to be removed.
- Gently remove the battery using the cloth pull tab.
- Removing the battery uncovers the SSD. Remove the screw, and the SSD will freely lift up and out.
- Remove the metal shield from the old SSD and place it on the new one.
- Reassemble the unit by following the previous steps in reverse.
Once the new SSD is installed, users will need to make a bootable USB drive with the Steam Deck OS (download here). Once this is completed, insert the USB into the Steam Deck and hold down Volume – and Power until a tone plays. When the boot manager shows up, select the USB drive and wait until a prompt with four options appears. Choose the one that says “Re-image Steam Deck.” Confirm the operation and wait for the OS to install.
After the Steam Deck reboots, it should act just like it does when a user first takes it out of the box. If it fails to install updates, just keep trying, and it should eventually start acting right. After the OS loads, users should check the available storage against the reported size. It should reflect the size of the new drive.


