With the release of Mario Kart Tour this morning, Nintendo detailed the Mario Kart Tour character odds, explaining the game’s random reward system to those wondering, “How does the Mario Kart Tour Pipe work?” That being said, the Pipe drop rates reveal came with a whole list of notes and caveats that make it fairly confusing. We dug through the reward appearance rate lists and footnotes to create this easy-to-understand Mario Kart Tour drop chances guide. Below, you’ll find a full explanation of the Pipe reward system, followed by a list of all Pipe driver, kart, and glyder item rarities.
Mario Kart Tour | Pipe random reward system explained
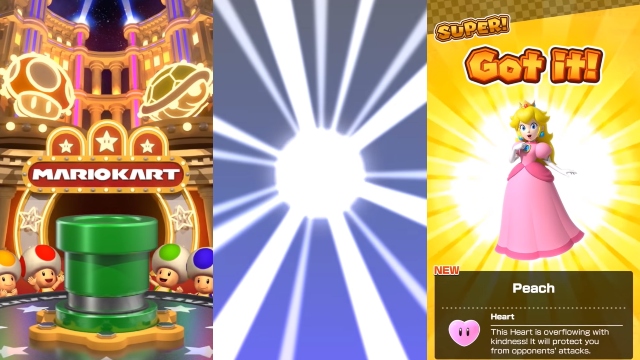
The Mario Kart Tour Pipe serves as the game’s main source of rewards, unlocking a random driver, kart, or glider when you “fire off” the Pipe. The Pipe can be fired off once for five Rubies or 10 times for 45 Rubies, and it can be used 100 times per week. These 100 uses — and your progress whittling down the available items in the Pipe (more on that below) — will reset when the Pipe changes each week. High-End Spotlight rewards are special drivers and items obtainable only during the game’s two week-long seasons known as “Tours” (though Nintendo notes that they may appear in different Pipes in the future, and possibly at different drop rates).
ALSO: Mario Kart Tour Controls Explained | How to drift, use items, and more
Each Pipe reward appears with the likelihood listed in the “Driver, kart, and glider drop rates” section below. Along with this percentage value, you can only receive a certain number of rewards from each rarity level per 100 Pipe uses. This means that, even though you have a 5% chance of getting Dry Bones, you would never be able to be lucky (or unlucky) enough to receive him more than 32 times per 100 Pipe uses.
In fact, you’re guaranteed to receive at least one reward of each type by the time you’ve used 100 Pipe pulls — though the exact reward you’ll get is random for all categories except High-End Spotlight. Each category’s “quantity by rarity” value is listed below, and you can view the number of rewards of each rarity you have yet to obtain by tapping “Details” beneath the Pipe selection screen.
Quantity by rarity (max number of each item type you can receive per 100 Pipe uses)
- High-End Spotlight (3 total)
- Drivers: 1
- Karts: 1
- Gliders: 1
- High-End (3 total)
- Drivers: 1
- Karts: 1
- Gliders: 1
- Super (20 total)
- Drivers: 9
- Karts: 7
- Gliders: 4
- Normal (74 total)
- Drivers: 32
- Karts: 26
- Gliders: 16
This quantity by rarity limit also means that, while the odds of receiving a High-End Spotlight character may be very small for any given Pipe pull, the chances you’ll get one increase after you’ve used up all the available rewards of a specific category. For example, if you receive 32 Dry Bones, you will no longer be able to get any Normal drivers, so your chances of getting any other reward type increase. That being said, there are 74 total Normal items obtainable per 100 Pipe uses, so you could potentially have to use the Pipe 75 times before you receive a Super (or rarer) item.
Additionally, as long as you haven’t exhausted the quantity by rarity for its category, you can receive duplicates of a reward from the Pipe. You are guaranteed to receive the tour’s High-End Spotlight rewards before you have zero (of 100) Pipe uses left. These are the only particular rewards you’re guaranteed to get before the Pipe is empty, as the selection from each other category is randomized. Duplicates of drivers, karts, and gliders obtained from the Pipe will essentially merge into the one you already have, increasing its rank.
Finally, if you choose, you can reset the Pipe’s contents to full, bringing your total available uses back to 100. While this will not get rid of any of the rewards you’ve pulled from the Pipe so far, it will undo all progress you’ve made as far as reducing the number of available rewards of each rarity type. This means that, if you collect 32 Dry Bones and then reset the Pipe, you will go back to having 32 chances to get a Normal driver, reducing your chances of receiving a different reward (including those better than Normal drivers). We do not recommend resetting the Pipe until you’ve exhausted all 100 uses or exhausted all possible High-End/High-End Spotlight drops (whichever comes first).
Mario Kart Tour | Driver, kart, and glider drop rates
Below, you’ll find a list of each reward item’s drop chance — but if you haven’t read the section above, do that first. The drop rates below are affected by the “quantity by rarity” value and a few other systems explained in that section, so it’s a good idea to make sure you understand those things before taking the following list at face value. Regardless, here’s the list of rarity values for every driver, kart, and glider in the Pipe. (Note: Pauline, Musician Mario, the Yellow Taxi, and the Fare Flier are specific to the New York Tour.)
Drivers
- High-End Spotlight (1% appearance rate)
- Pauline
- High-End (0.25% appearance rate)
- Dry Bowser
- Metal Mario
- Peachette
- Mario (Musician)
- Super (1% appearance rate)
- Donkey Kong
- Toad
- Bowser
- Mario
- Peach
- Yoshi
- Daisy
- Diddy Kong
- Toadette
- Normal (5.3333% appearance rate)
- Koopa Troopa
- Dry Bones
- Baby Daisy
- Baby Mario
- Baby Peach
- Shy Guy
Karts
- High-End Spotlight (1% appearance rate)
- Yellow Taxi
- High-End (0.3333% appearance rate)
- B-Dasher
- Badwagon
- Blue Badwagon
- Super (1% appearance rate)
- Daytripper
- Mach 8
- Soda Jet
- Barrel Train
- Turbo Yoshi
- Flame Flyer
- Super Blooper
- Normal (5.2% appearance rate)
- Birthday Girl
- Bullet Blaster
- Mushmello
- Pipe Frame
- Koopa Dasher
Gliders
- High-End Spotlight (1% appearance rate)
- Fare Flier
- High-End (0.3333% appearance rate)
- Swooper
- Gold Glider
- Bullet Bill Parachute
- Super (1% appearance rate)
- Flower Glider
- Peach Parasol
- Bob-omb Parafoil
- Shell Parachute
- Normal (5.3333% appearance rate)
- Super Glider
- Parachute
- Parafoil


